...
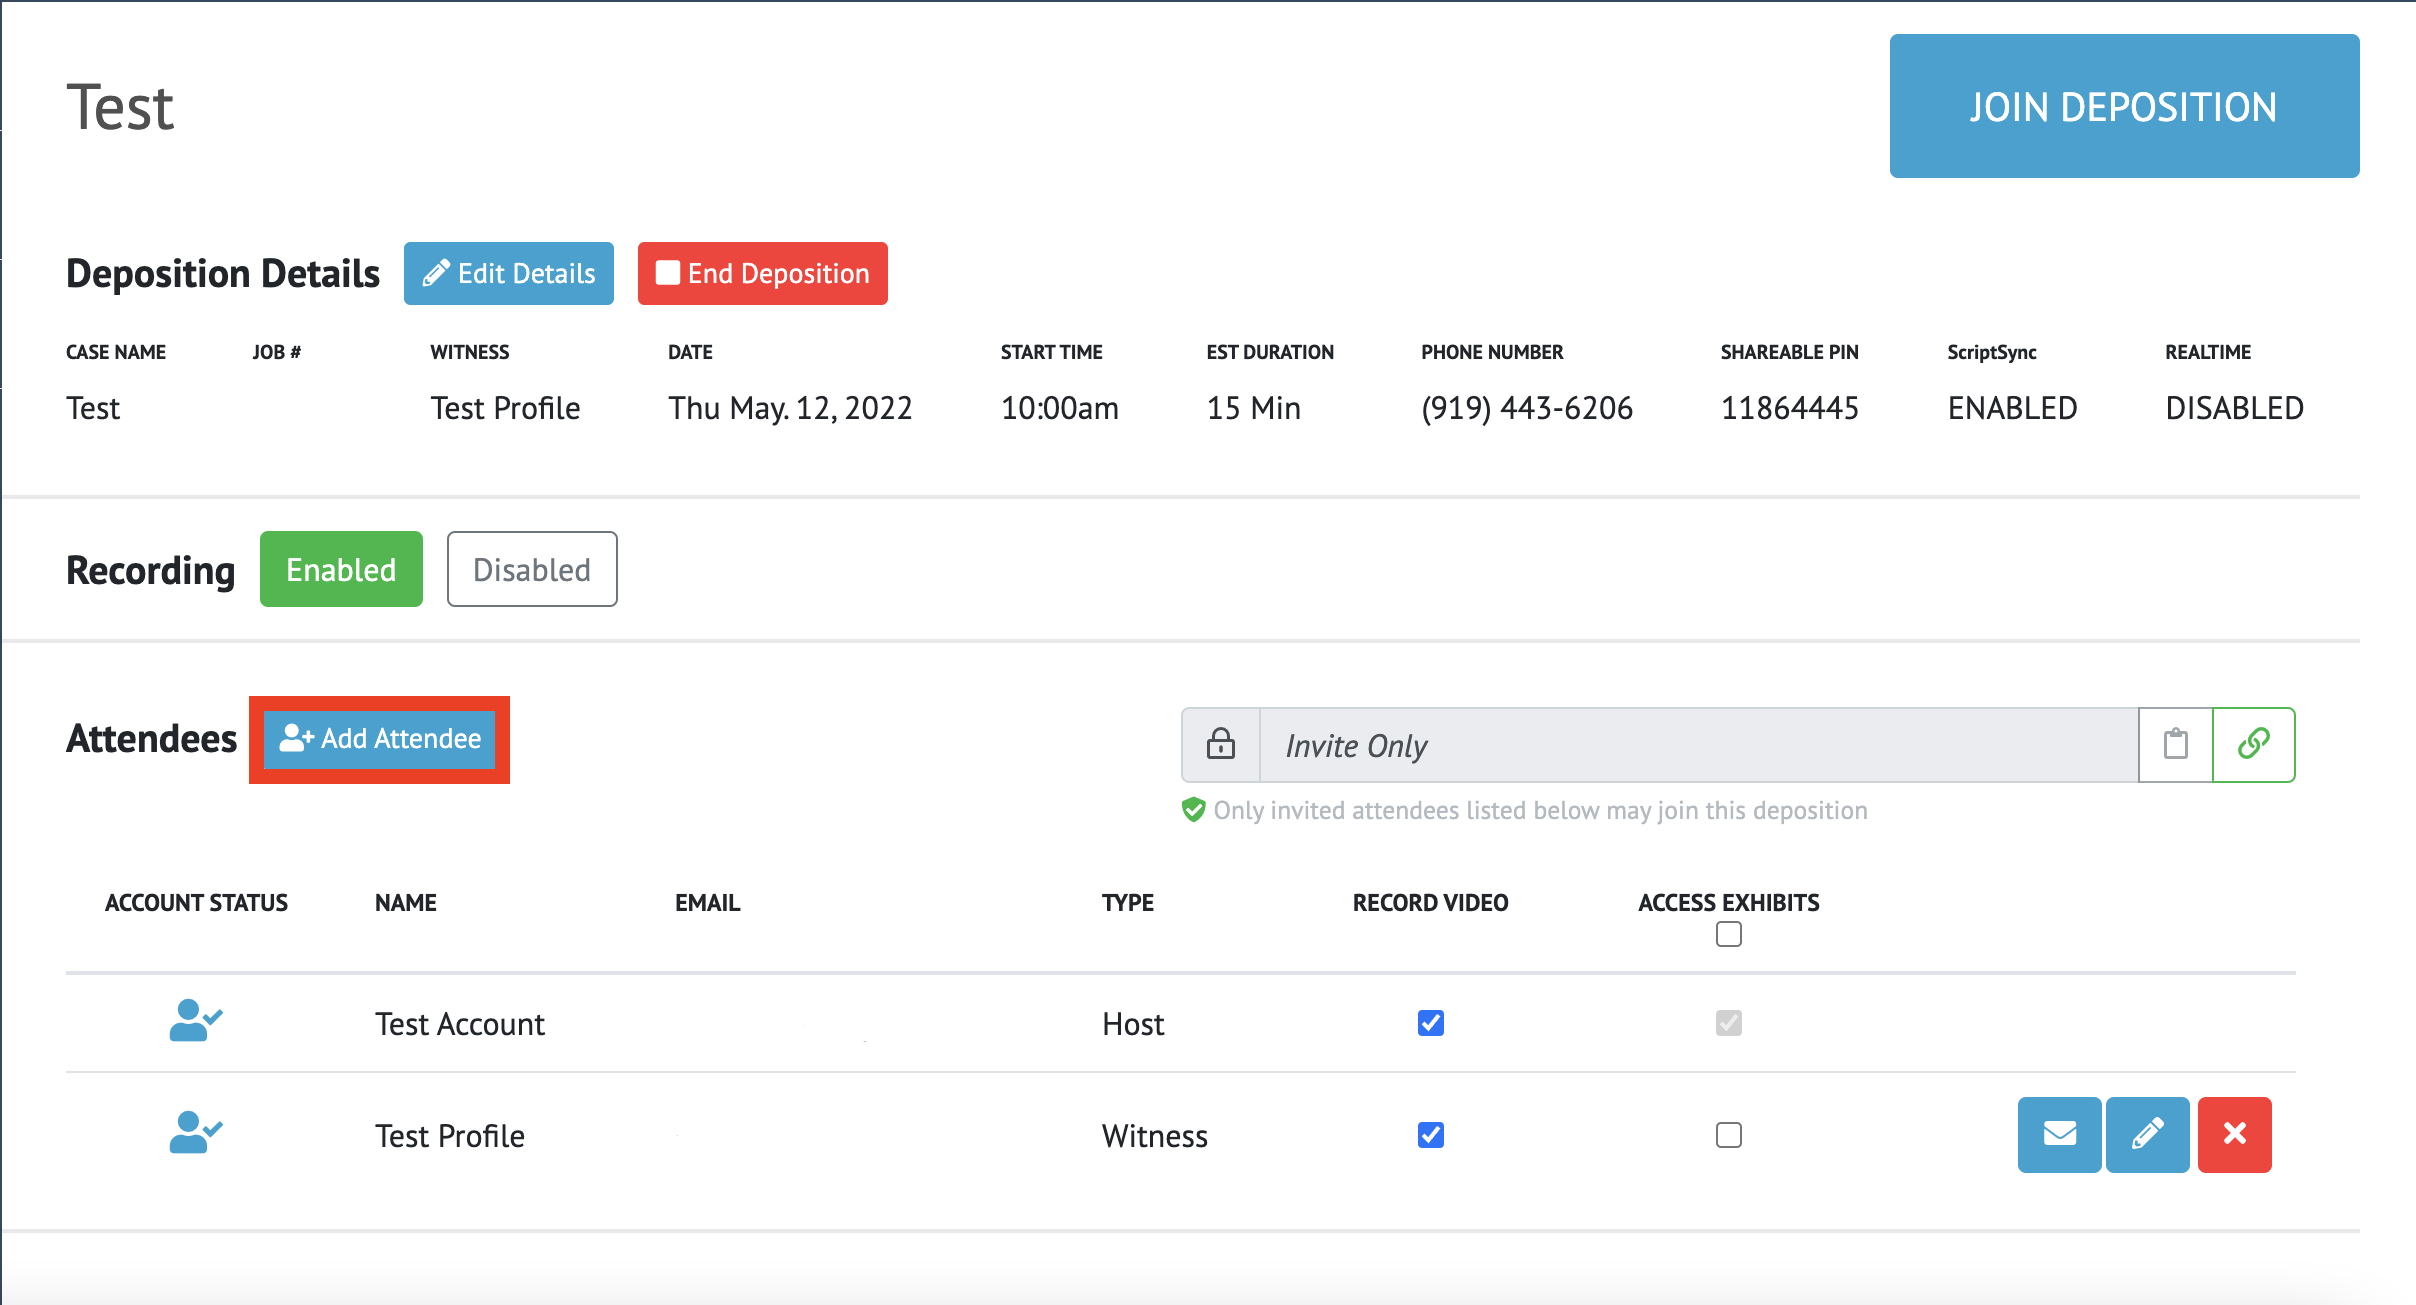
After creating a deposition, the platform will automatically direct you to the “Deposition Details” page
Here you can add attendees to the deposition
See steps to do so: How-to Add Attendees to a New Deposition
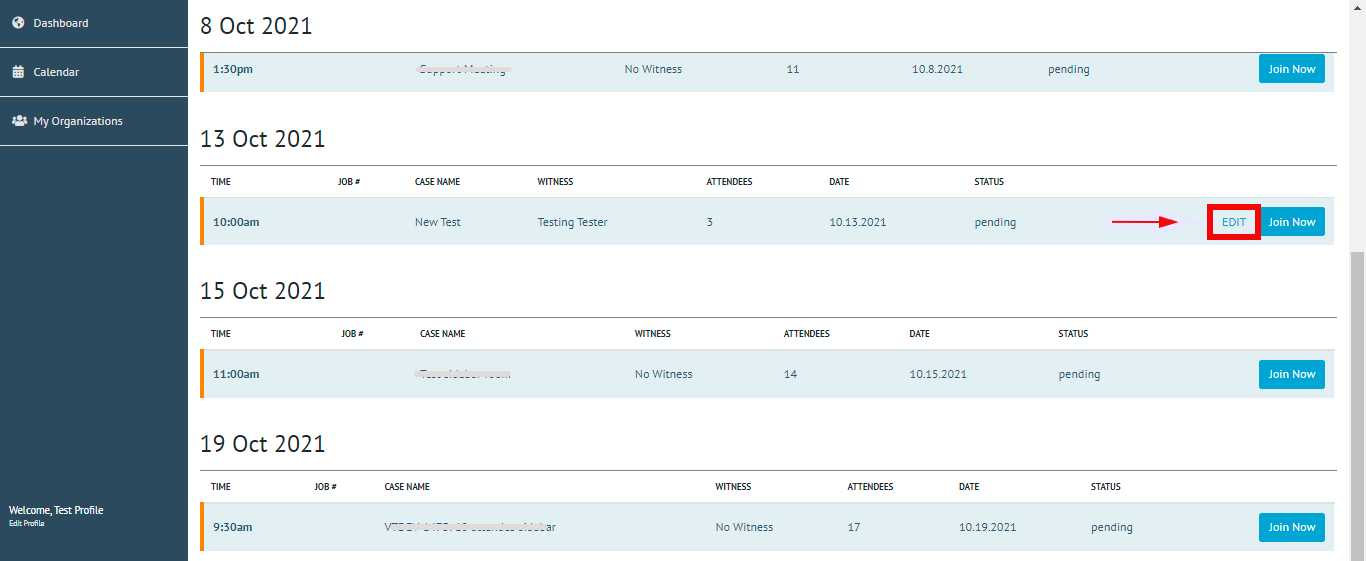
You can access these details at any time before and during a deposition by selecting the “Edit” button for that deposition, which is located on your Dashboard
.png?version=1&modificationDate=1655153305414&cacheVersion=1&api=v2)
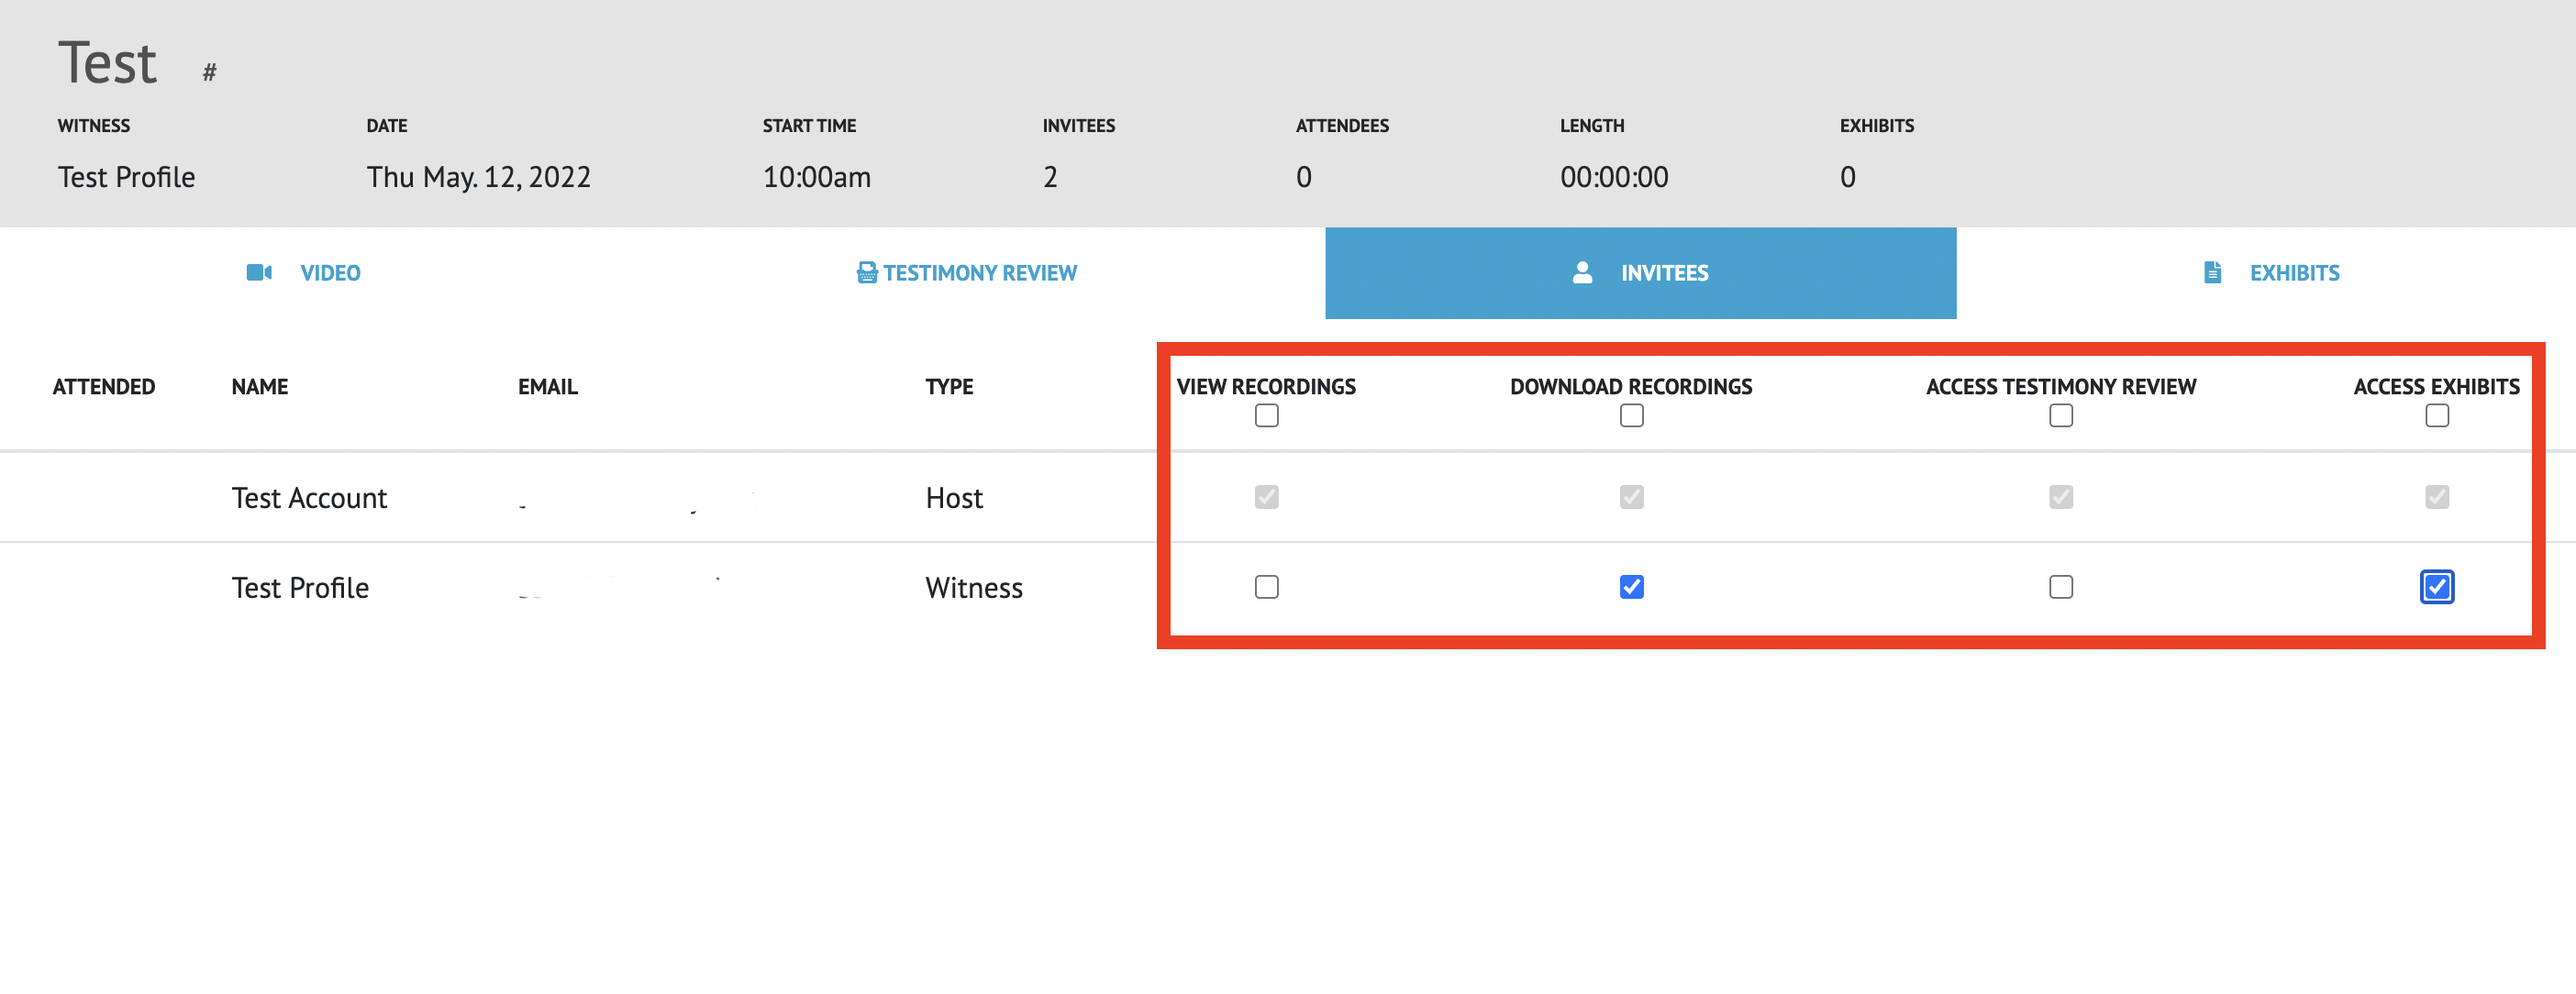
On the Deposition Details page, you are given the option to allow or disallow others from accessing video recordings and shared exhibits after the deposition has ended
To the right of every attendee, there is an Access Exhibits column
Video Assets will be available to grant to attendees after the Deposition has ended
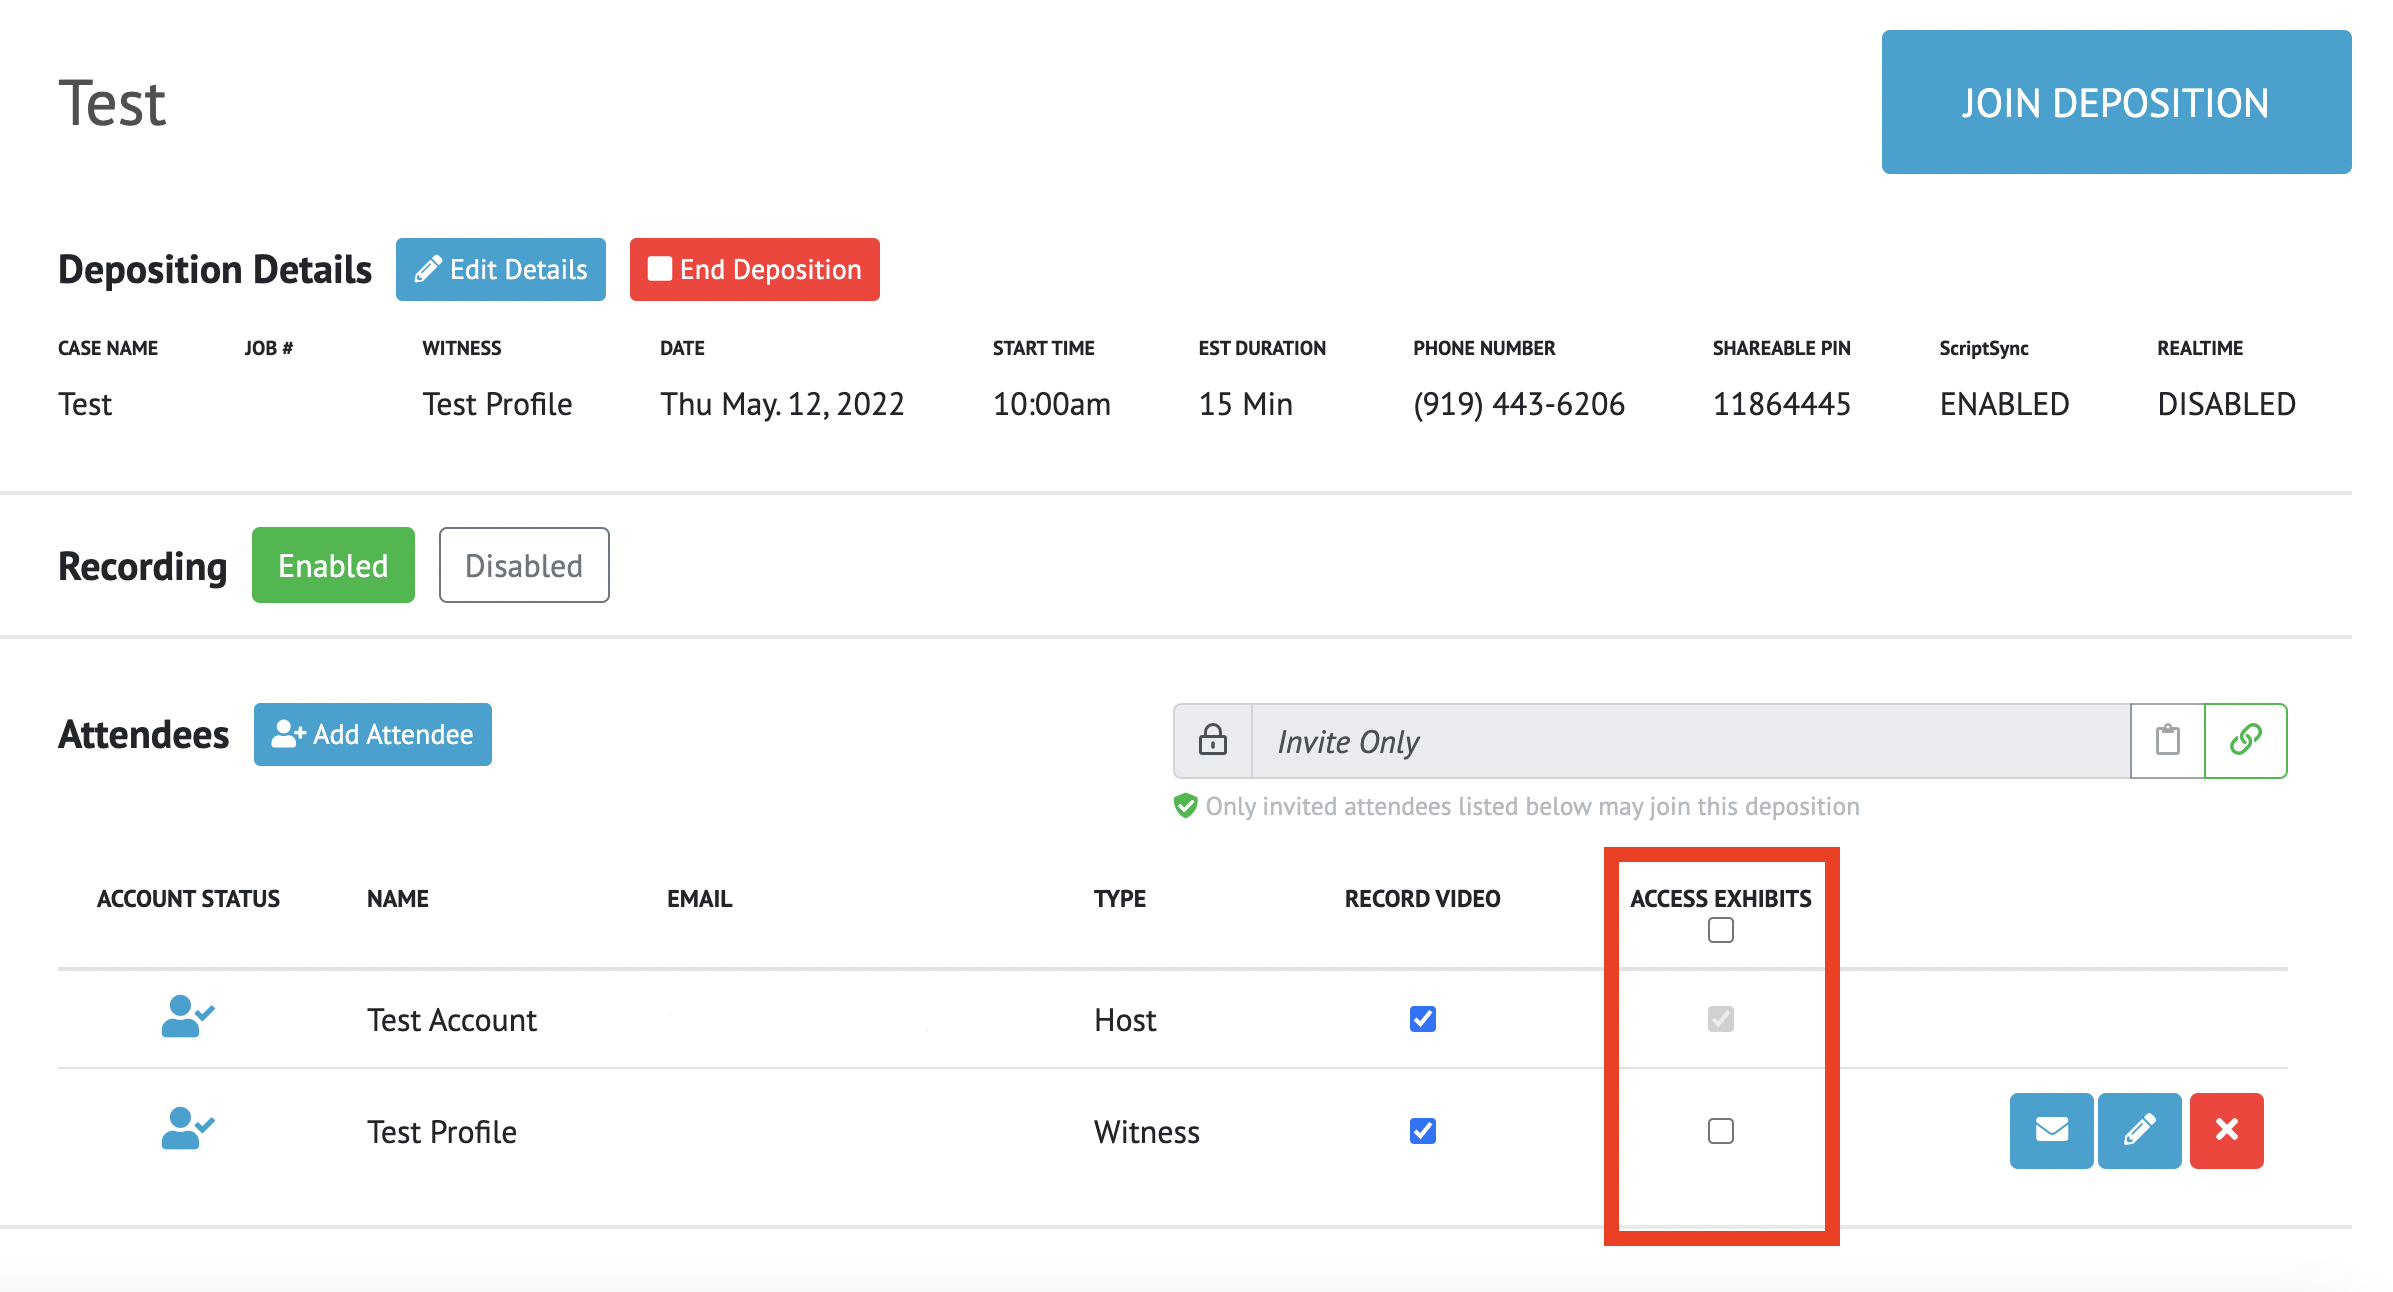
Attendees' checkboxes are unchecked by default, which means they will not have access to exhibits
To grant access to the exhibits, you must check each attendee’s checkbox within each column
By clicking Clicking the box directly below the column title, allows you to quickly grant or revoke access to all attendees with just one click
...
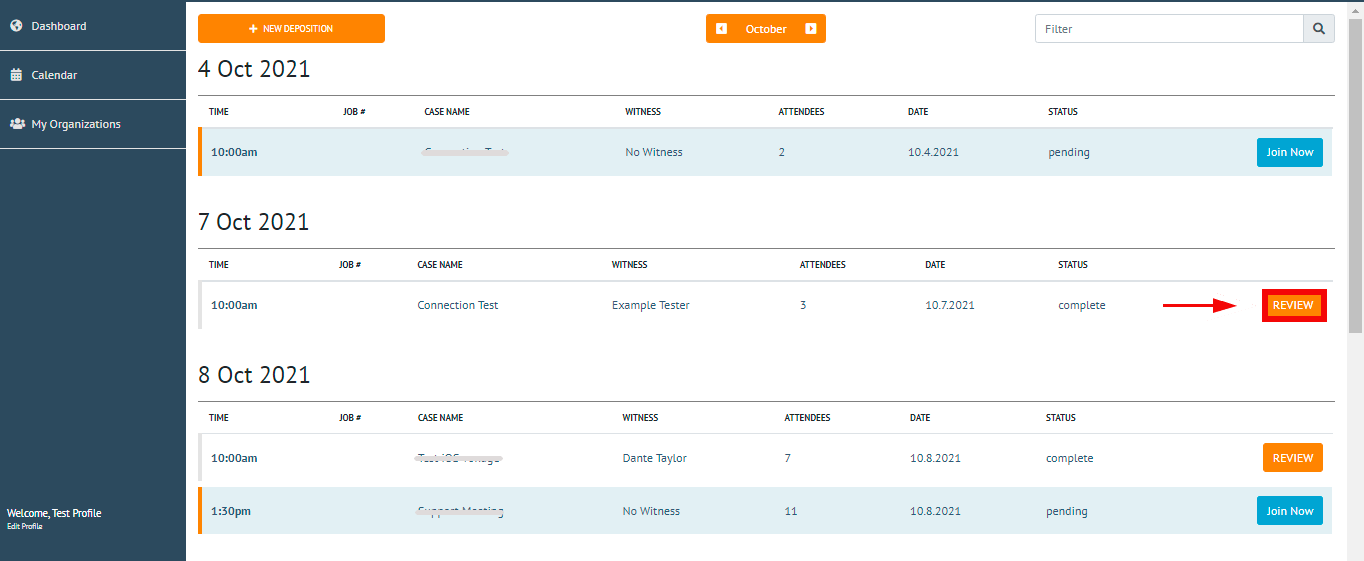
After the deposition has ended, you can access the deposition details by clicking the “Review” button in the dashboard
As the Host, this allows you to grant access to both video recordings and exhibits after the deposition is concluded.
.png?version=1&modificationDate=1655153336917&cacheVersion=1&api=v2)
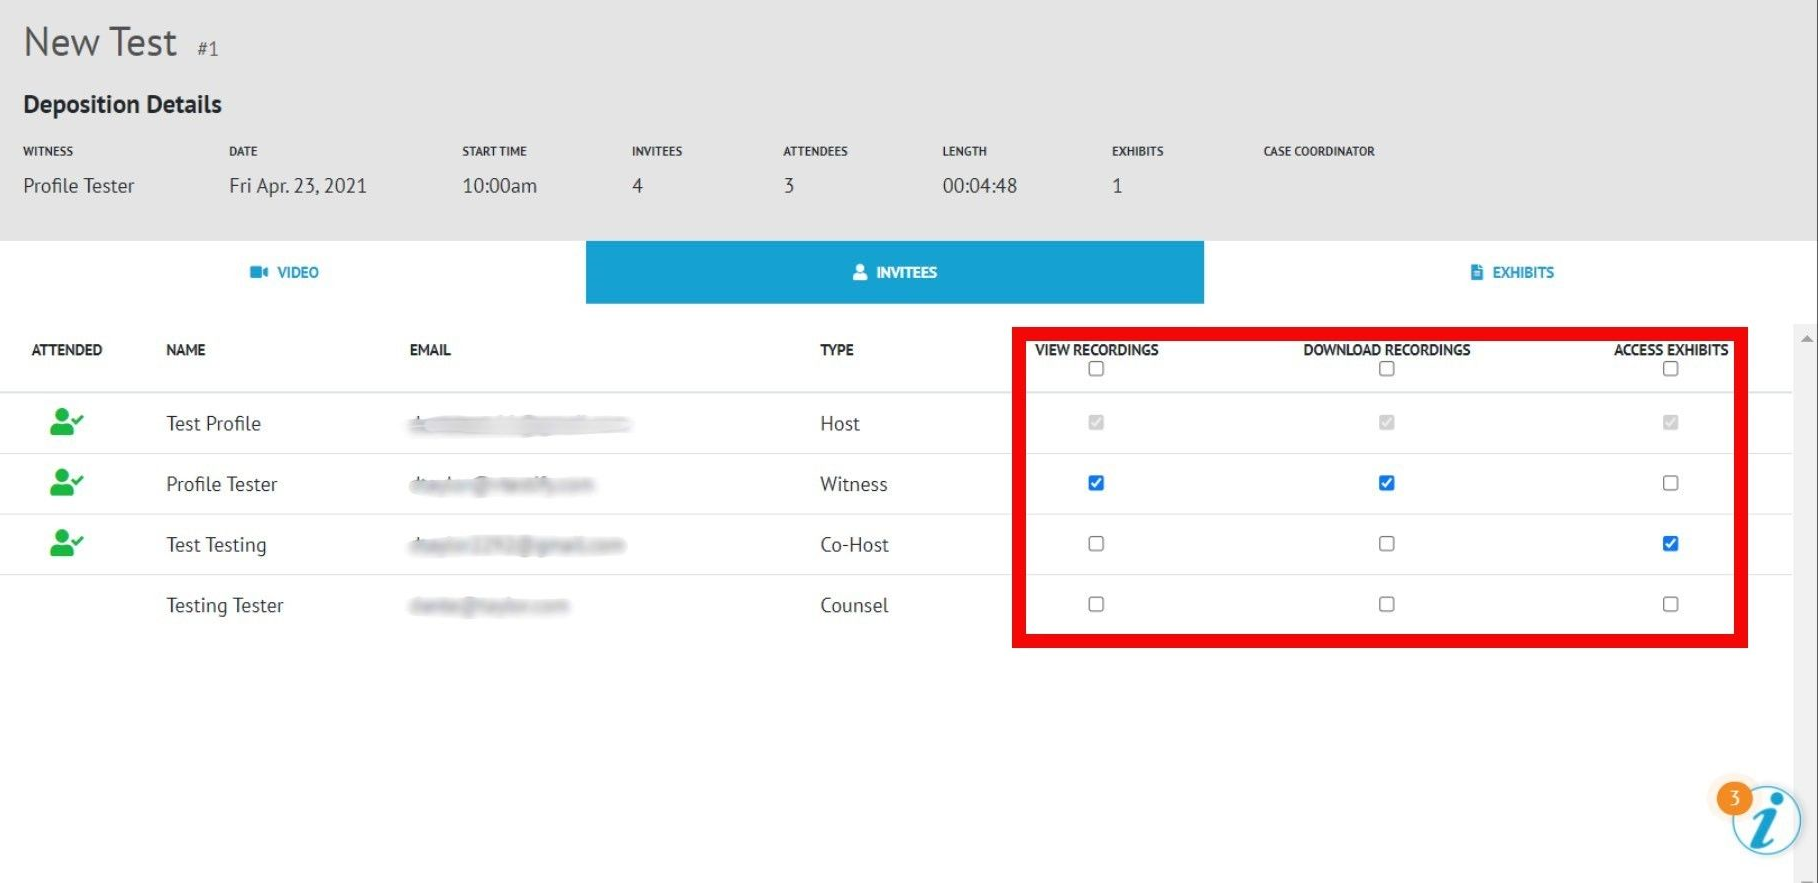
View all attendees invited to the deposition
If there is a green icon to the left of an invitee’s name, that person was present during the deposition. If there is no icon, that invitee did not attend the deposition

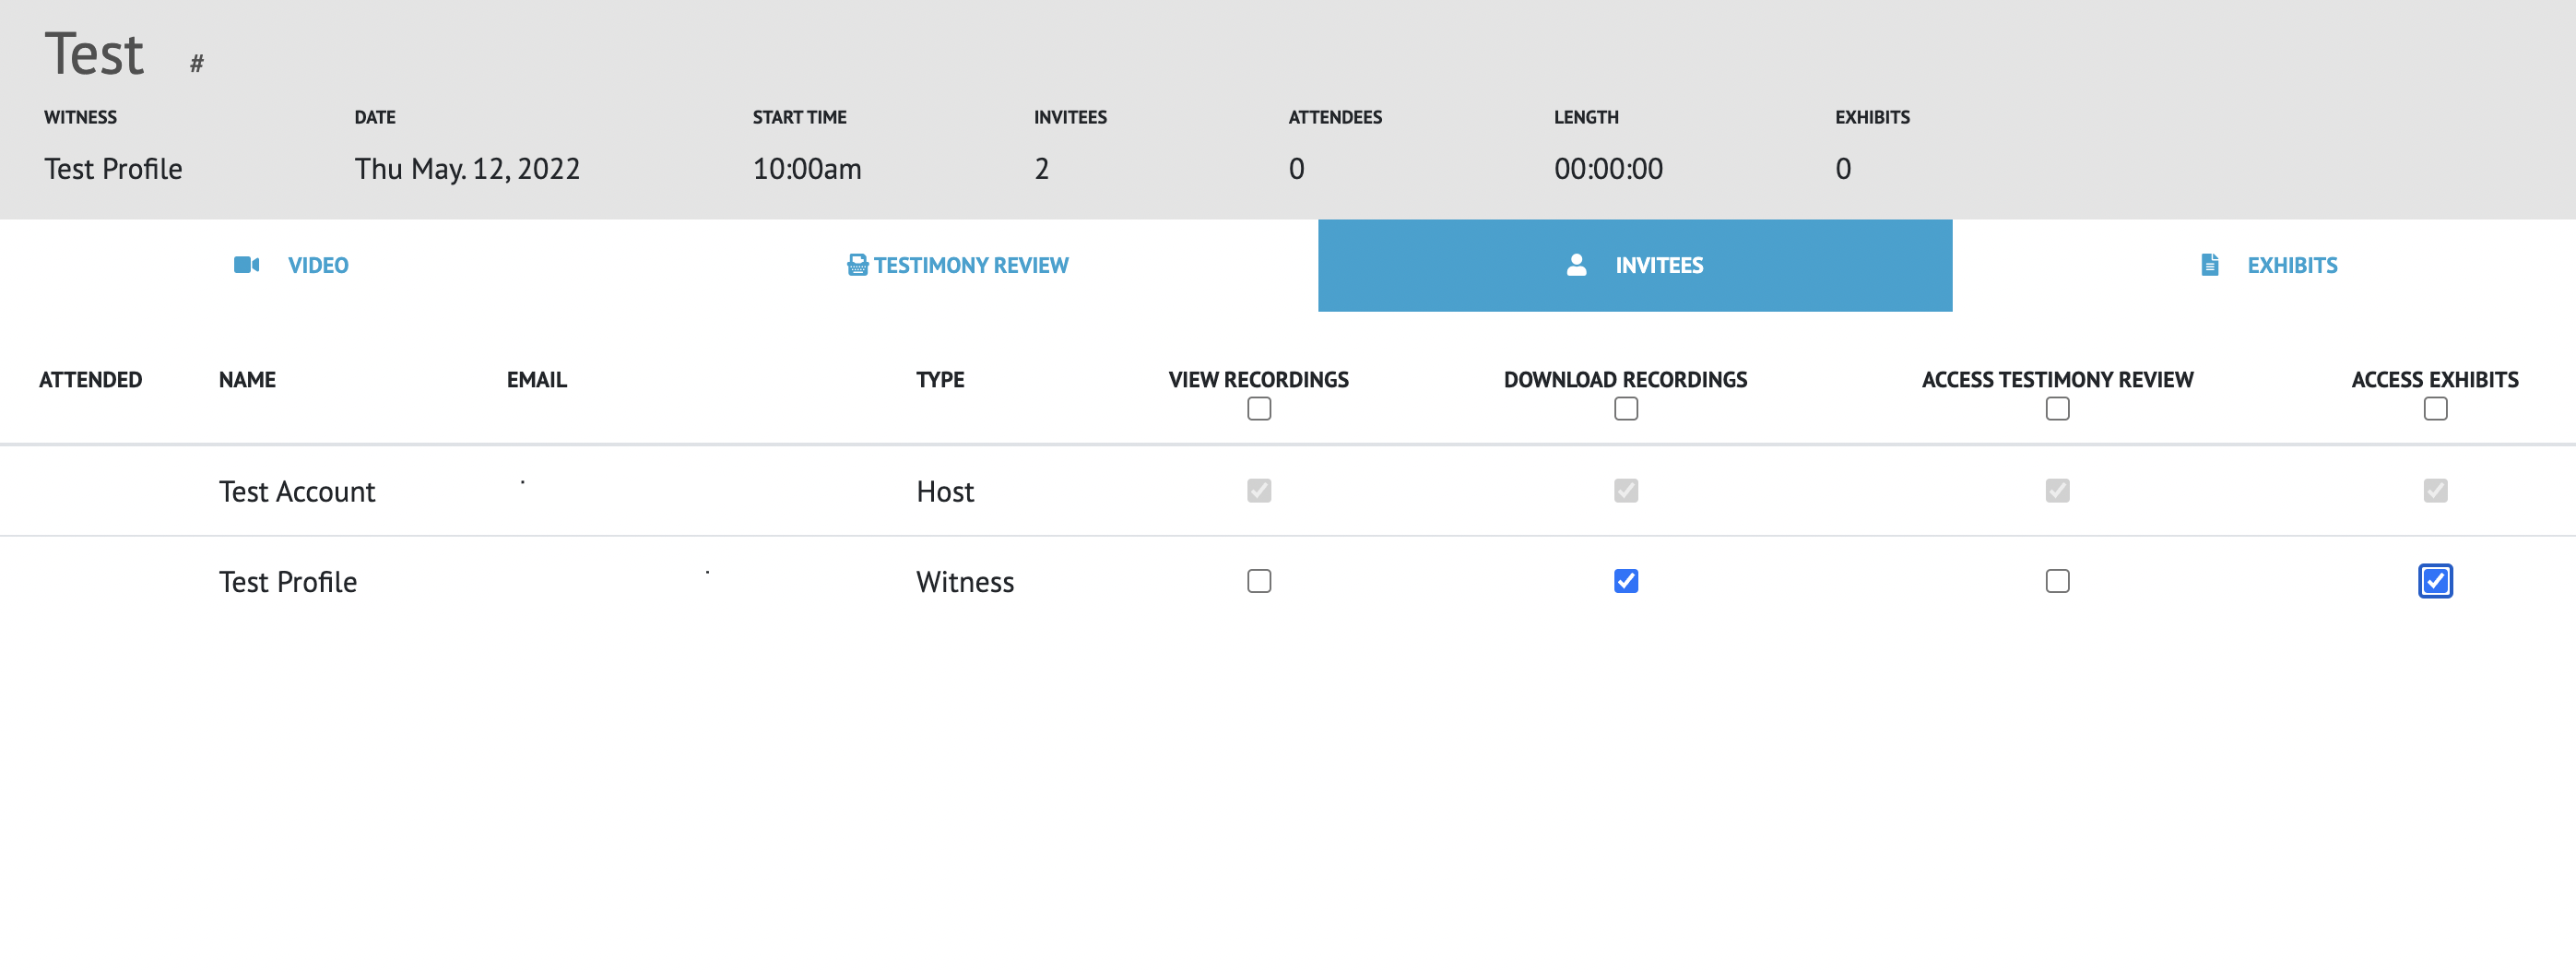
The Host will grant access to the recordings and exhibits, giving attendees the ability to view and download the files. Please see How-to Download Video Assets Post Deposition (Host)
'View recordings' will only give access to view the recorded videos
'Download recordings' will allow attendees to download the recordings to their computer
'Access Exhibits' allows an attendee to view and download the shared exhibits