...
As a Counsel attendee, you participate with either audio-only or with video and audio depending on the needs of the deposition
The Host has the ability to change how a Counsel participates
If a Co-Host is in the same organization as the Host, they will also have the ability to change how a Counsel participates
To turn off your video or audio feed when participating in the video role, click on the corresponding icon shown below
If you are joining as an Audio Only attendee your Video On/Off button will be disabled

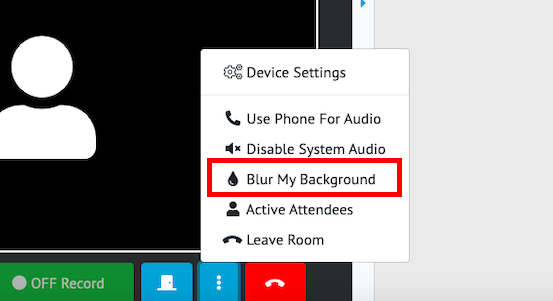
All attendees have the option to use the “Background Blur” Feature. This feature adds Background Blur to the video
Click on the '3 dots' context menu located next to the 'Red Telephone' icon
Click “Blur My Background”

You have the option to use the ‘Pop-out’ Feature on any attendee in order to bring their video feed into a new window. Please see How-to use the Pop-out Feature for more information
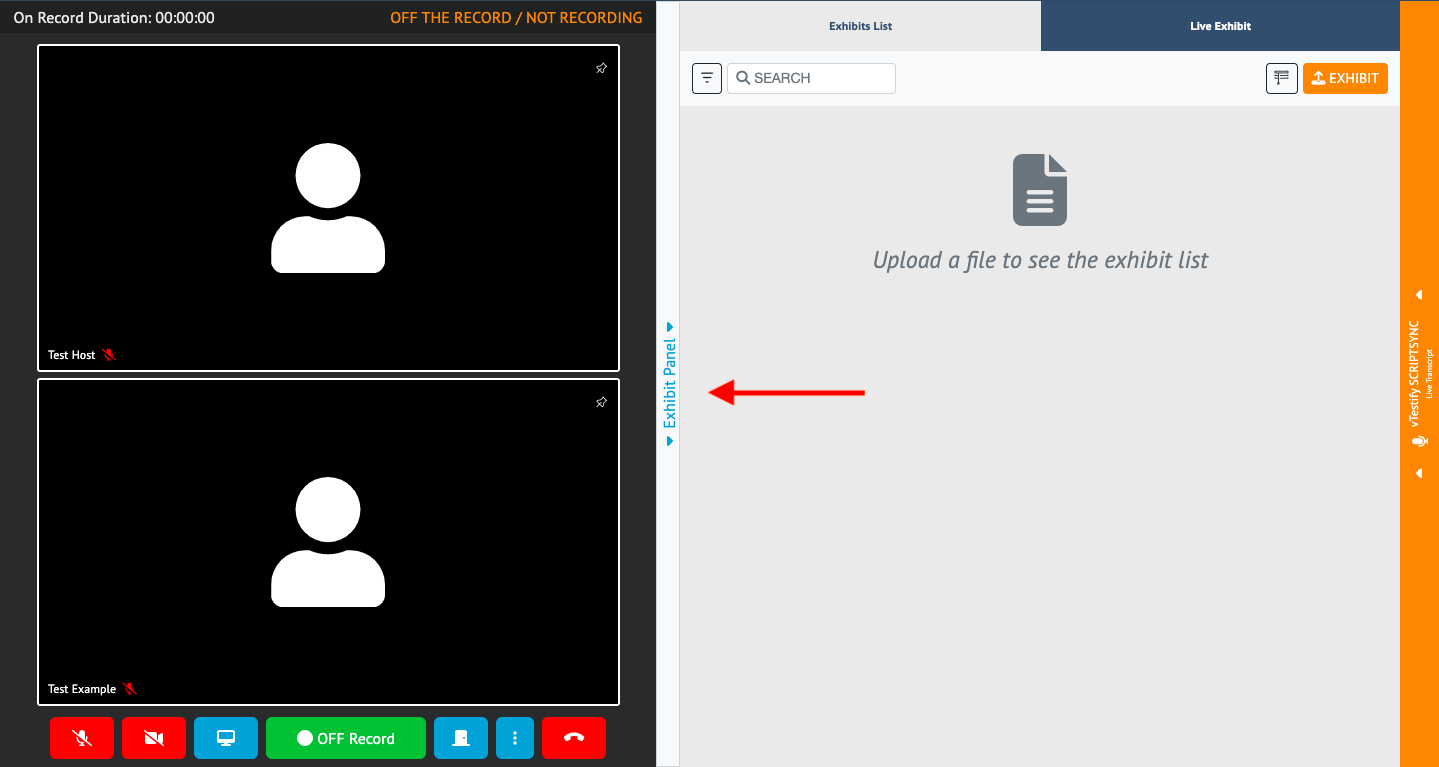
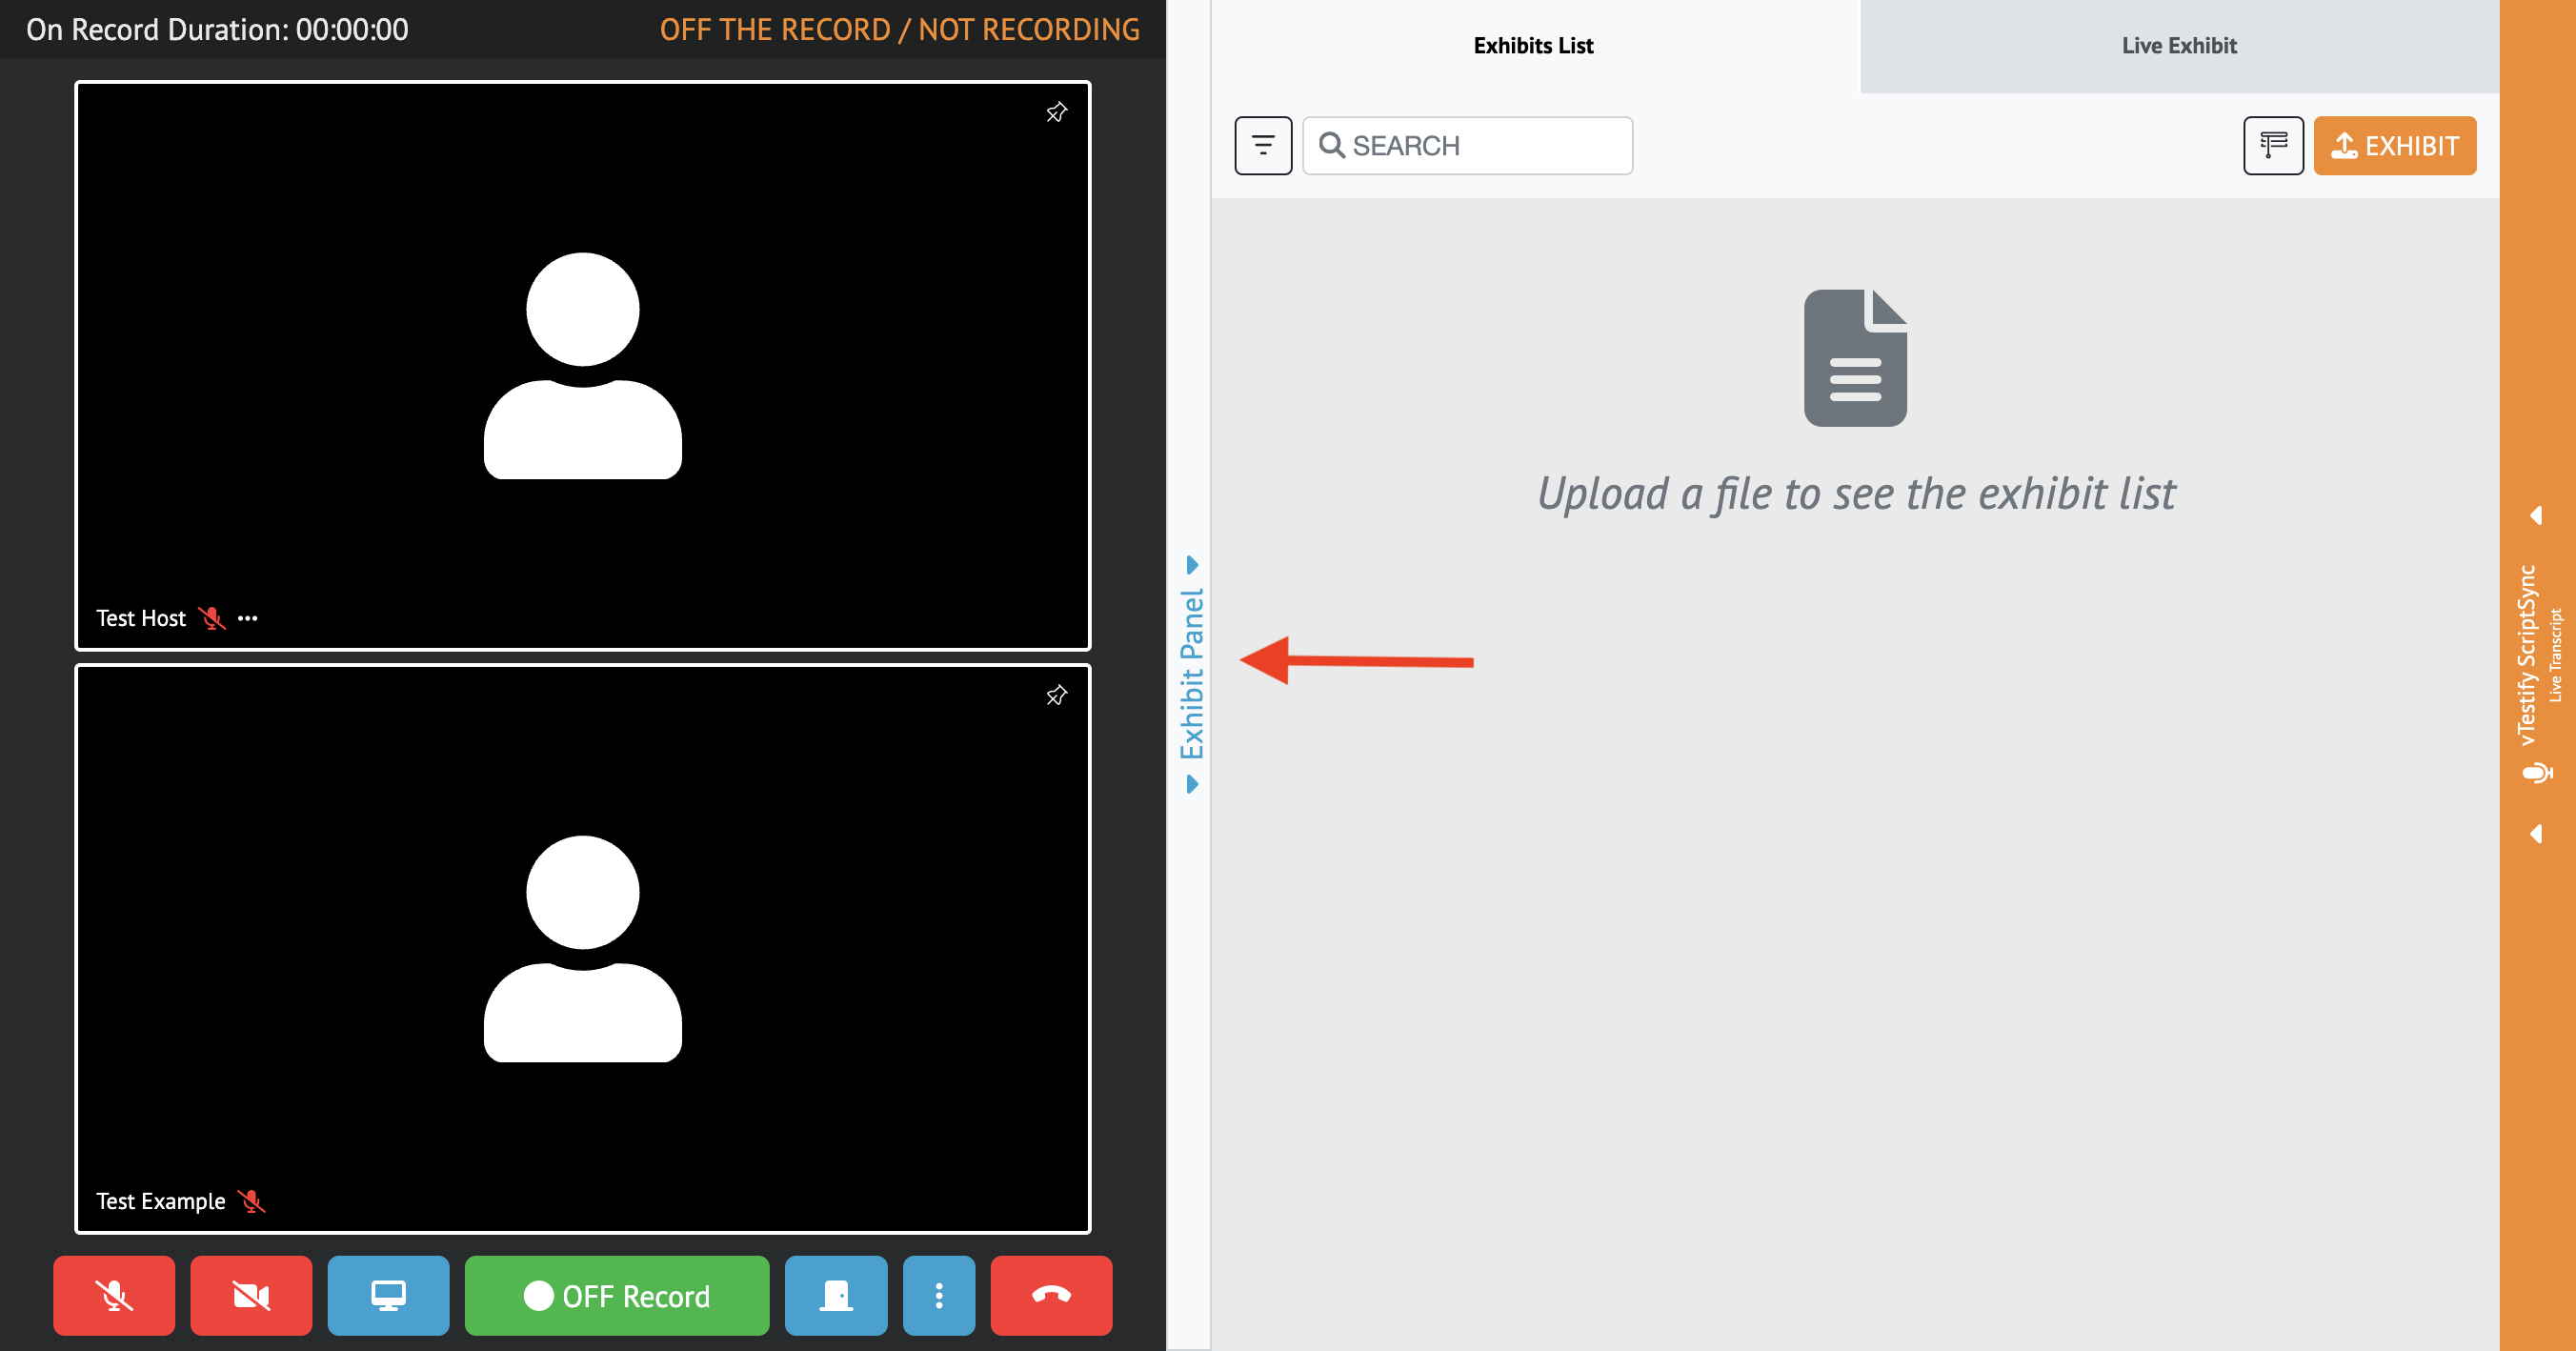
You can privately view and introduce exhibits on the record in the ‘Exhibit Panel’ located to the right of your screen
The virtual deposition platform supports .PDF, .PNG, .JPG, .XLXS, .DOCX, and .PPTX file types
For information on how to update file types, see the following link: Converting Old Office File Types to Supported File Types
You can upload an exhibit by clicking the orange ‘Exhibit’ button to the right of your screen
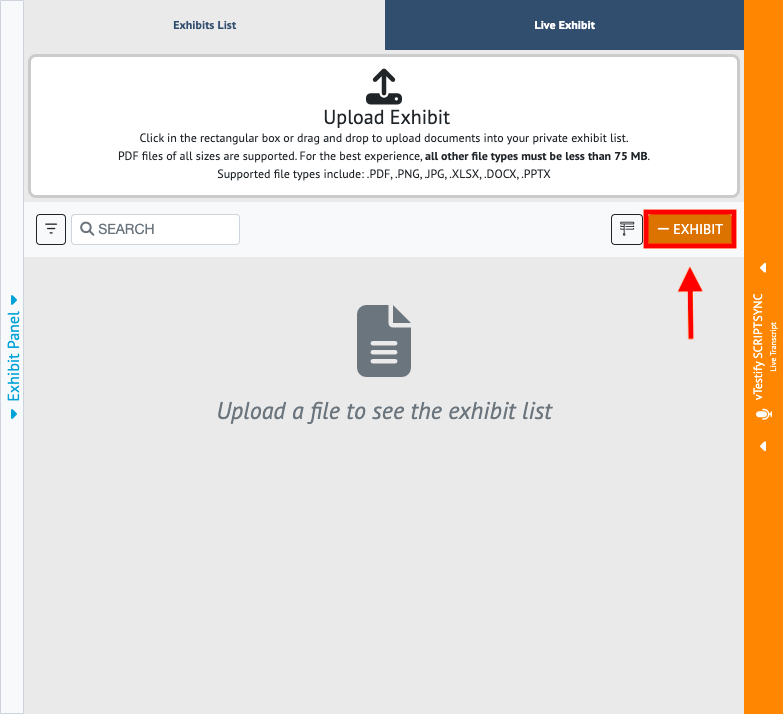
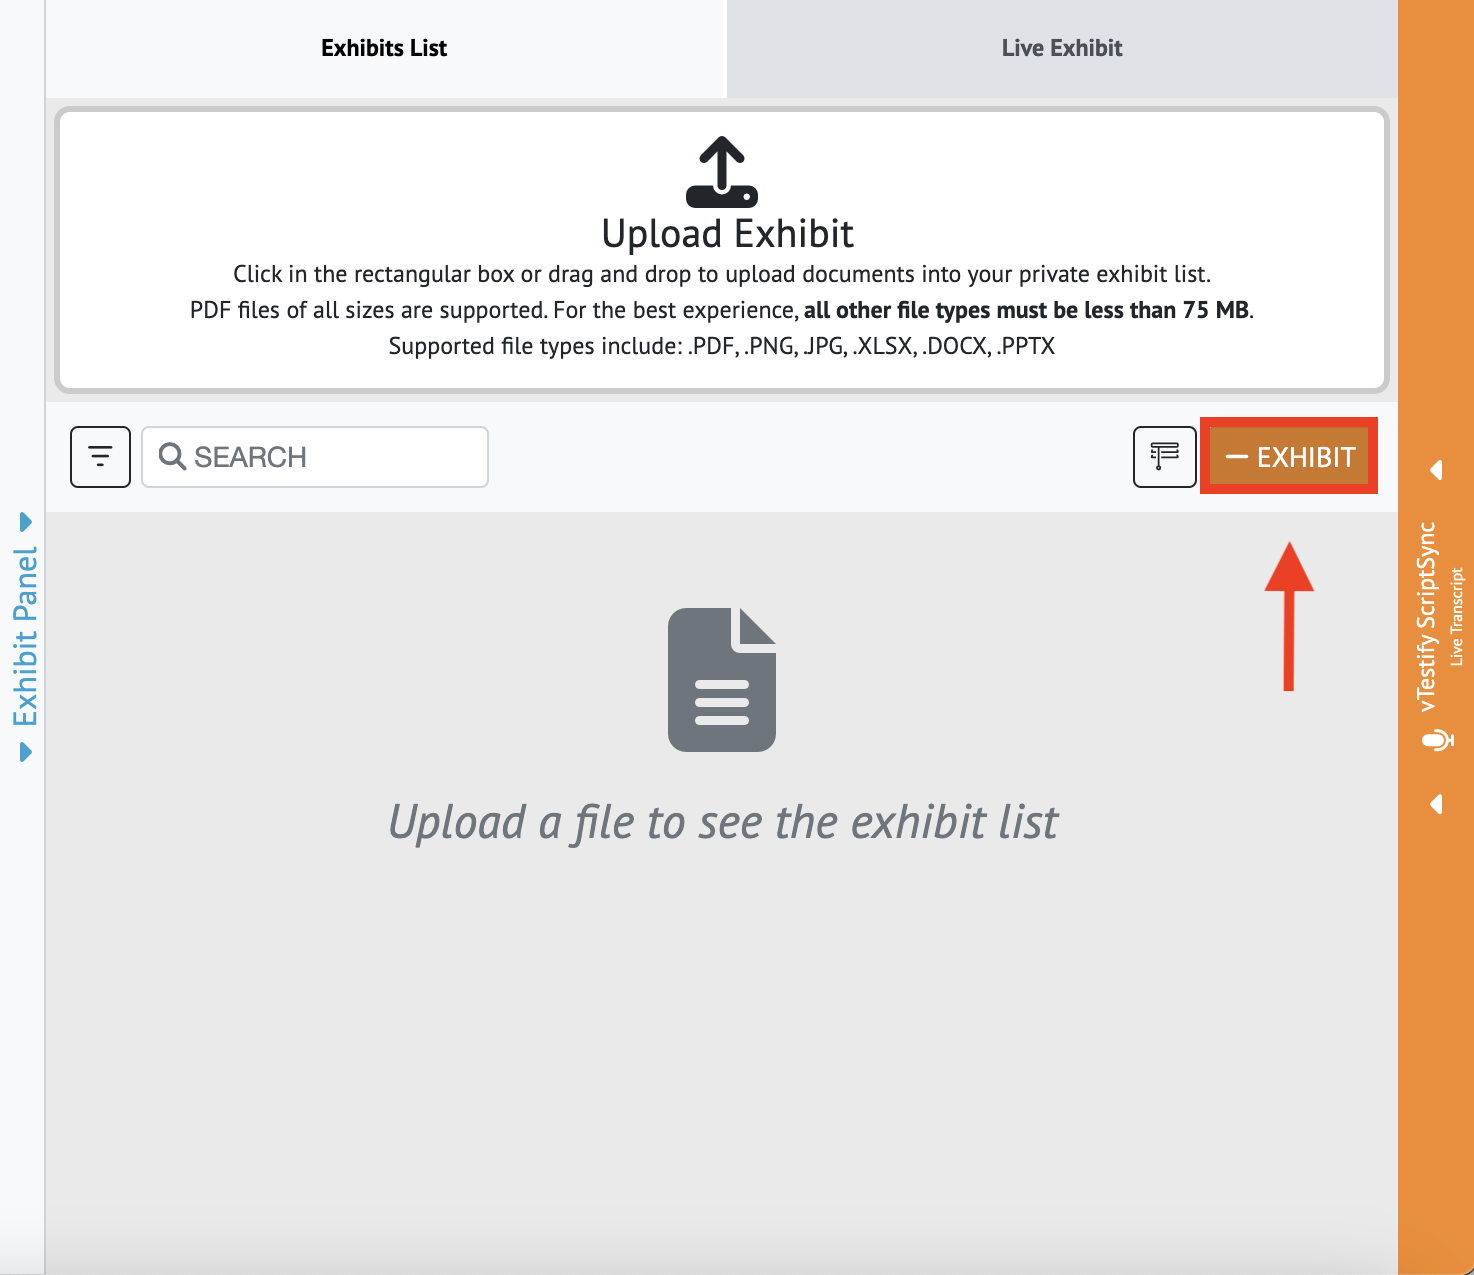
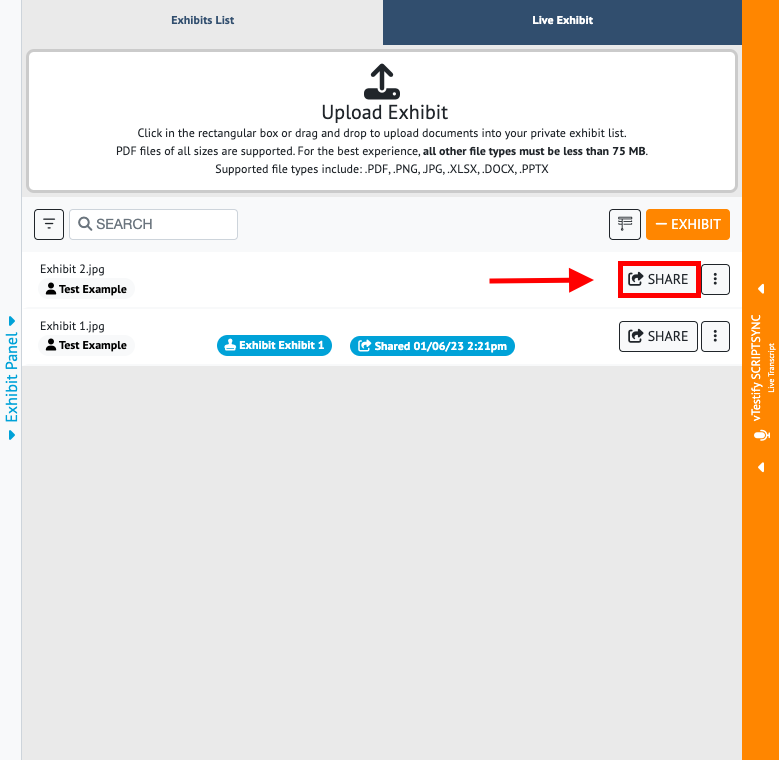
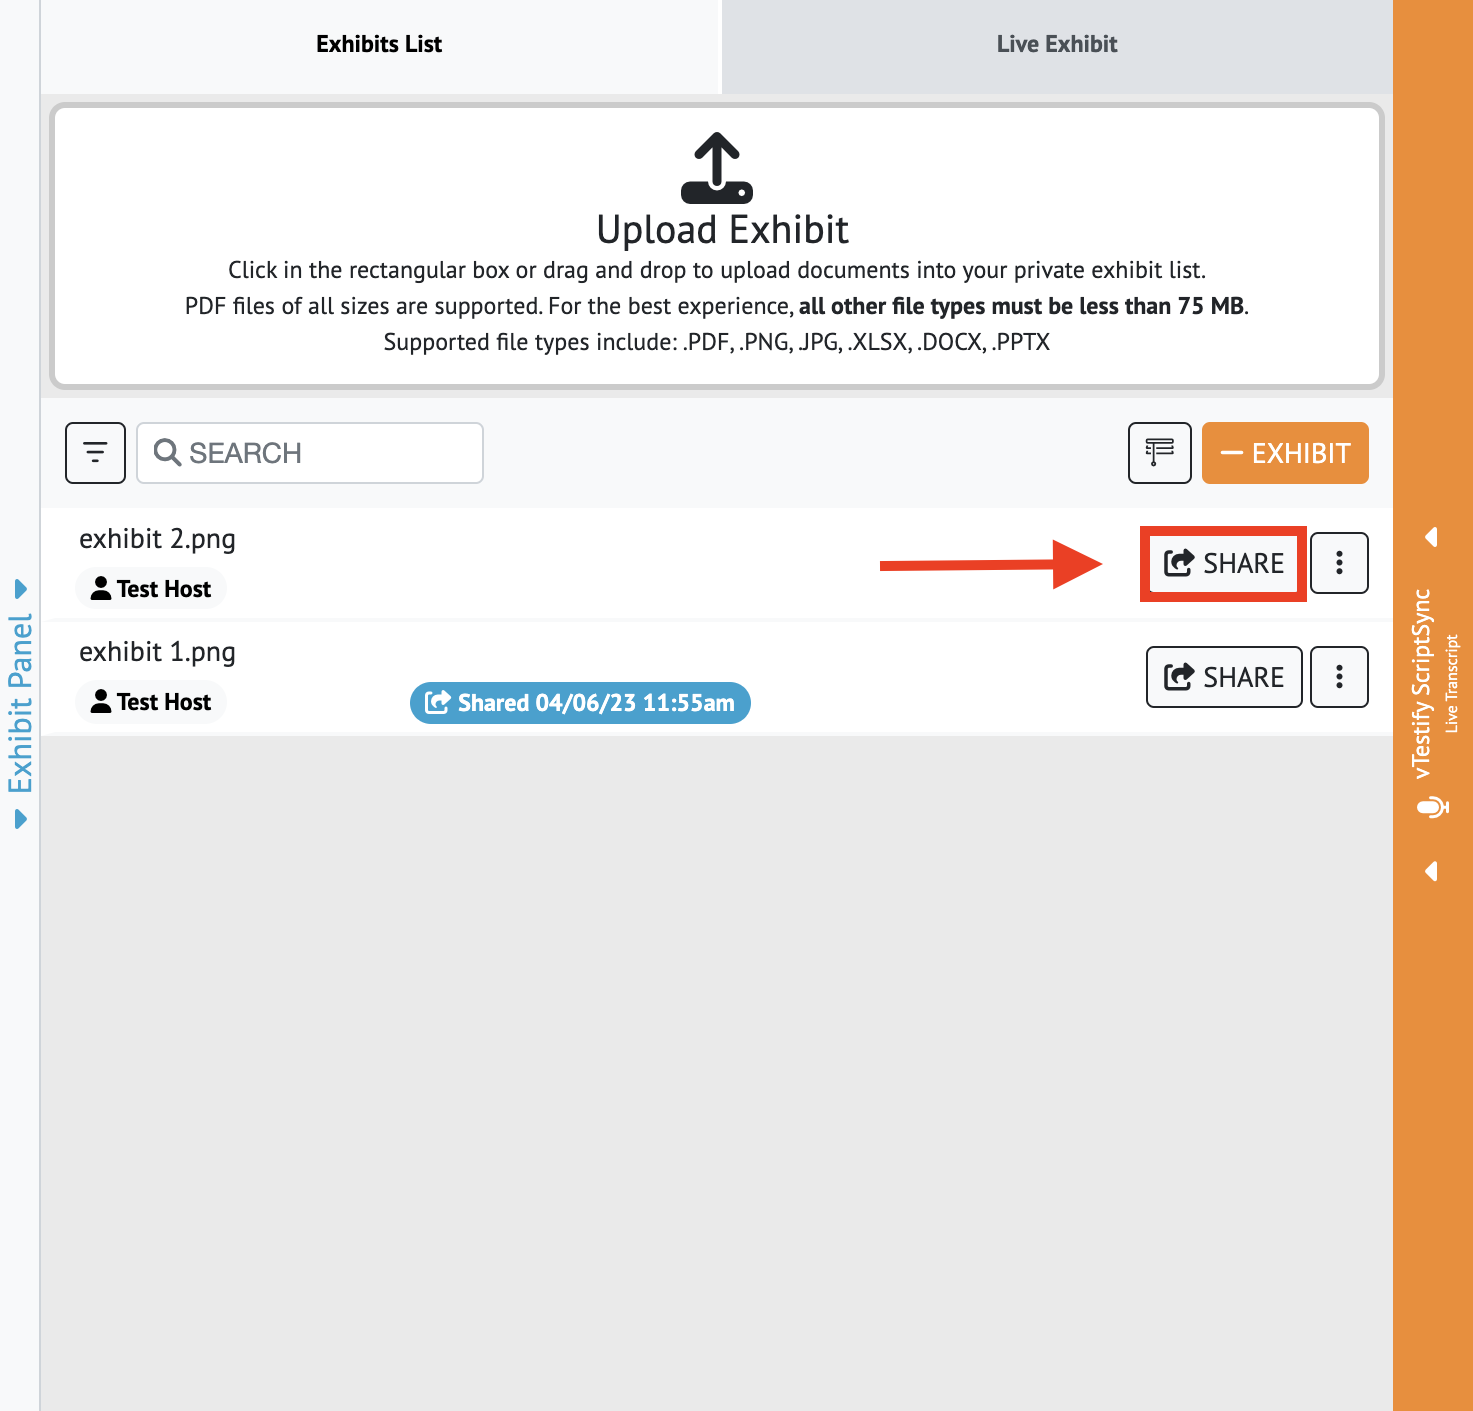
Once an exhibit has been uploaded, it will appear in the “Exhibits List” tab
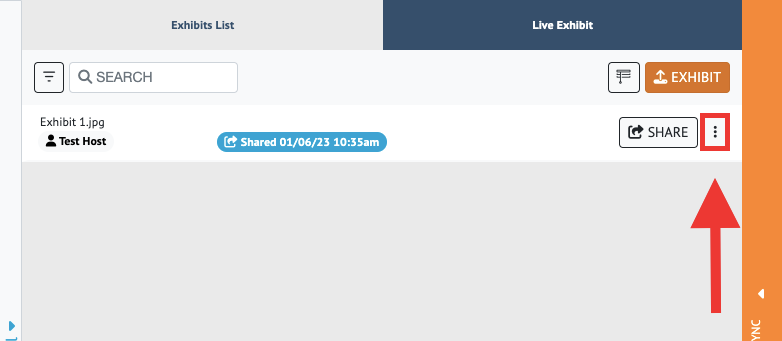
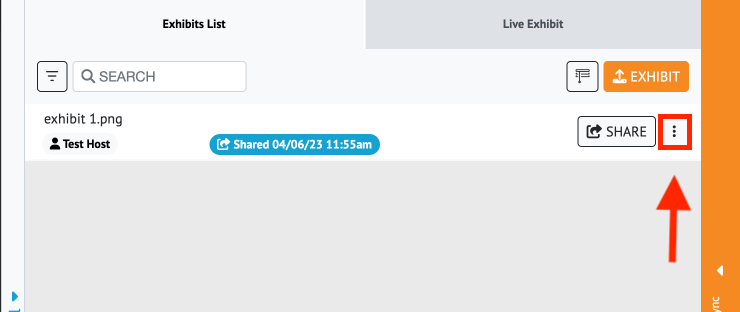
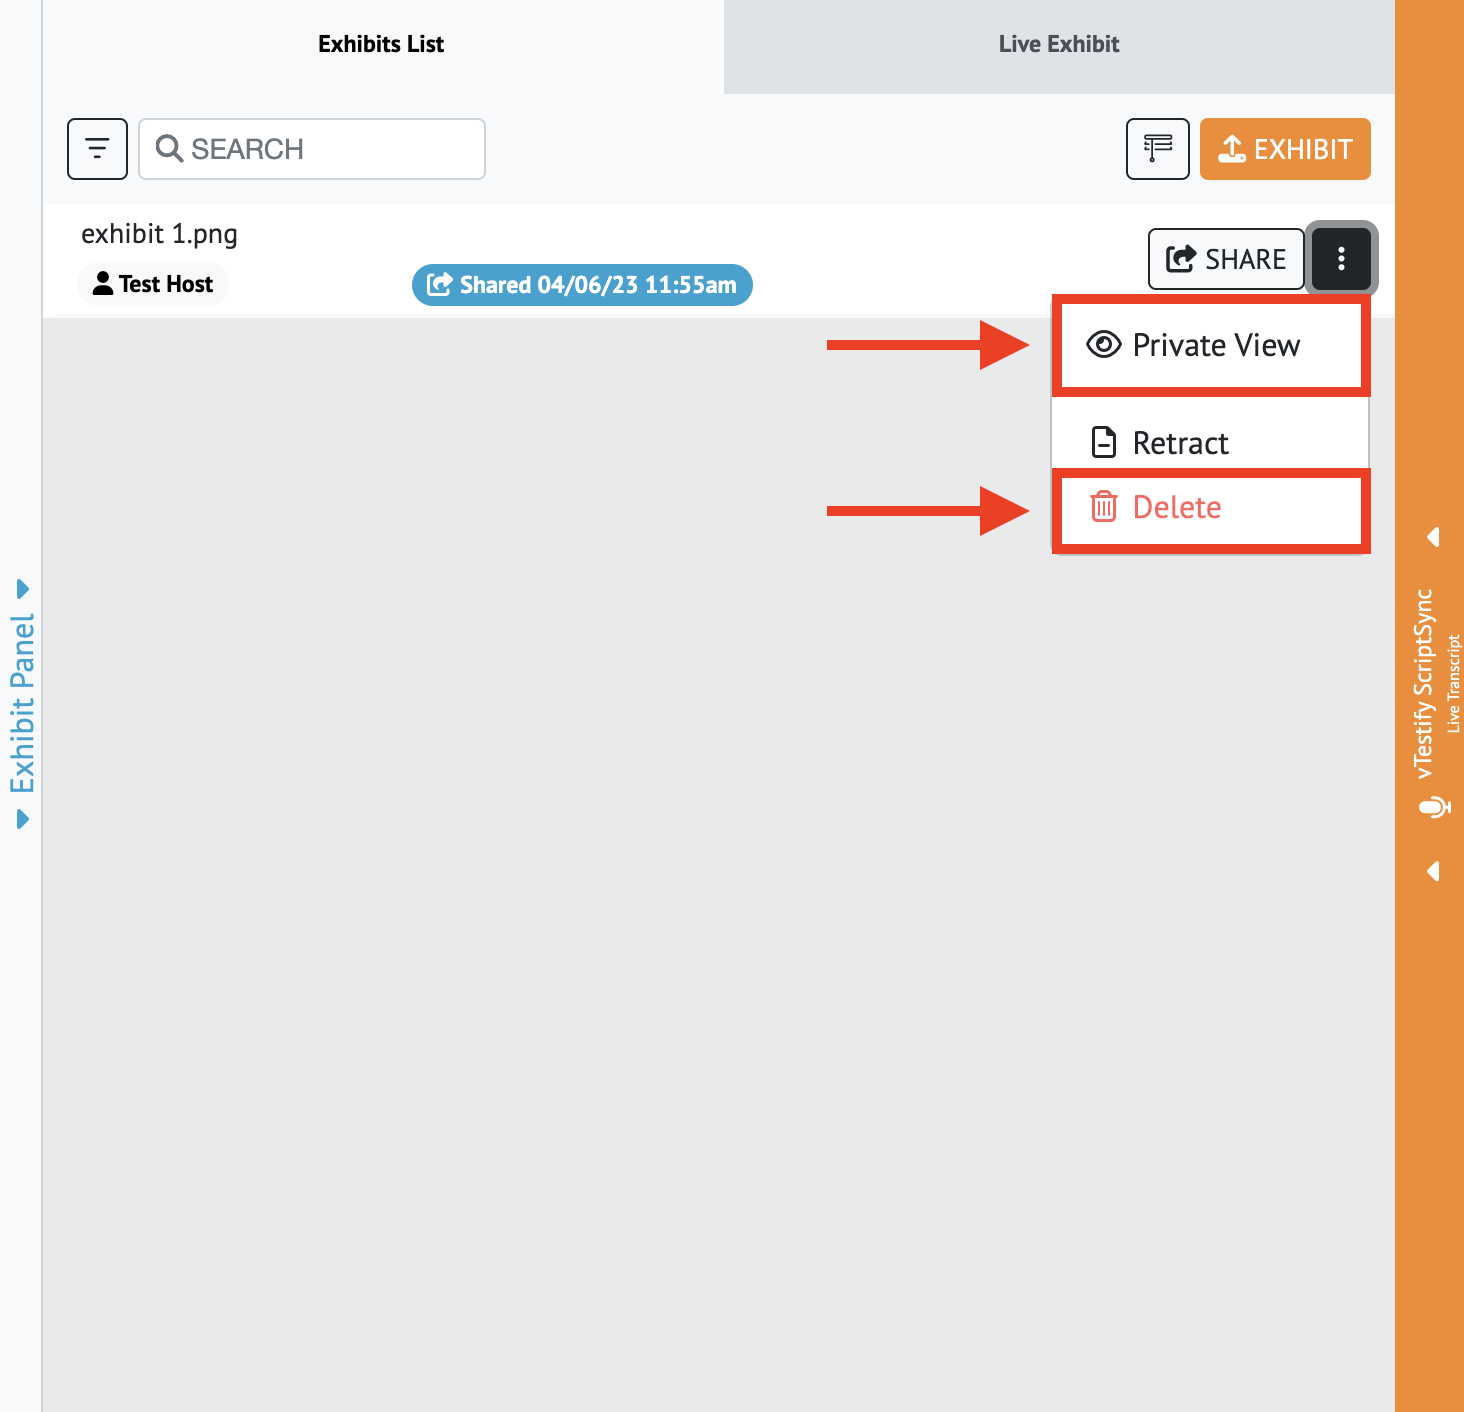
Click on the 3 Dot ‘options’ button next to the Share button
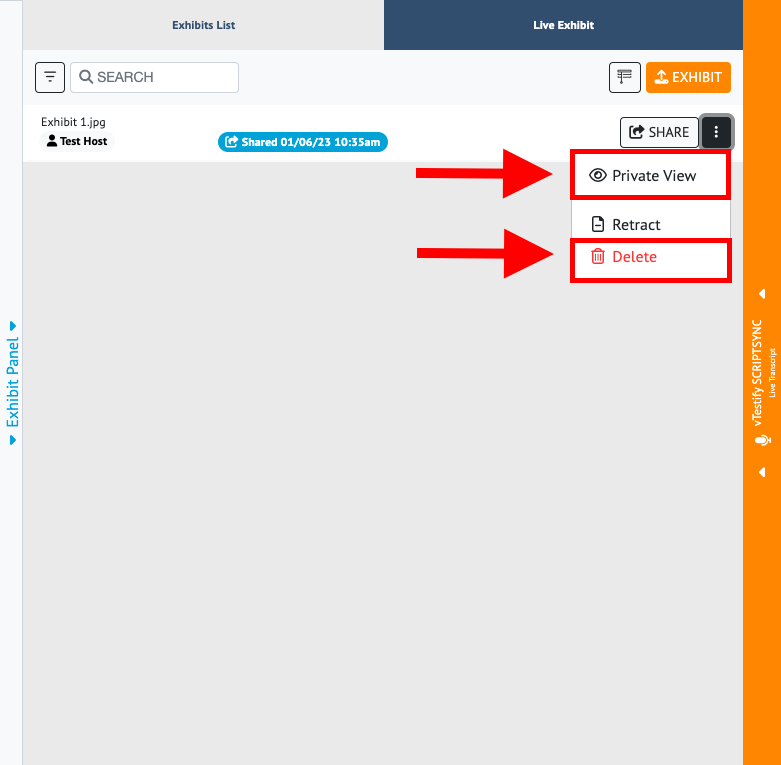
To view the exhibit before sharing it, select the “Private View” button
Uploaded exhibits may be stamped prior to sharing the exhibit. For more information please see How-to Stamp an Exhibit
To delete the exhibit before sharing it, select the “Delete” button
To share the exhibit, select the “Share” button
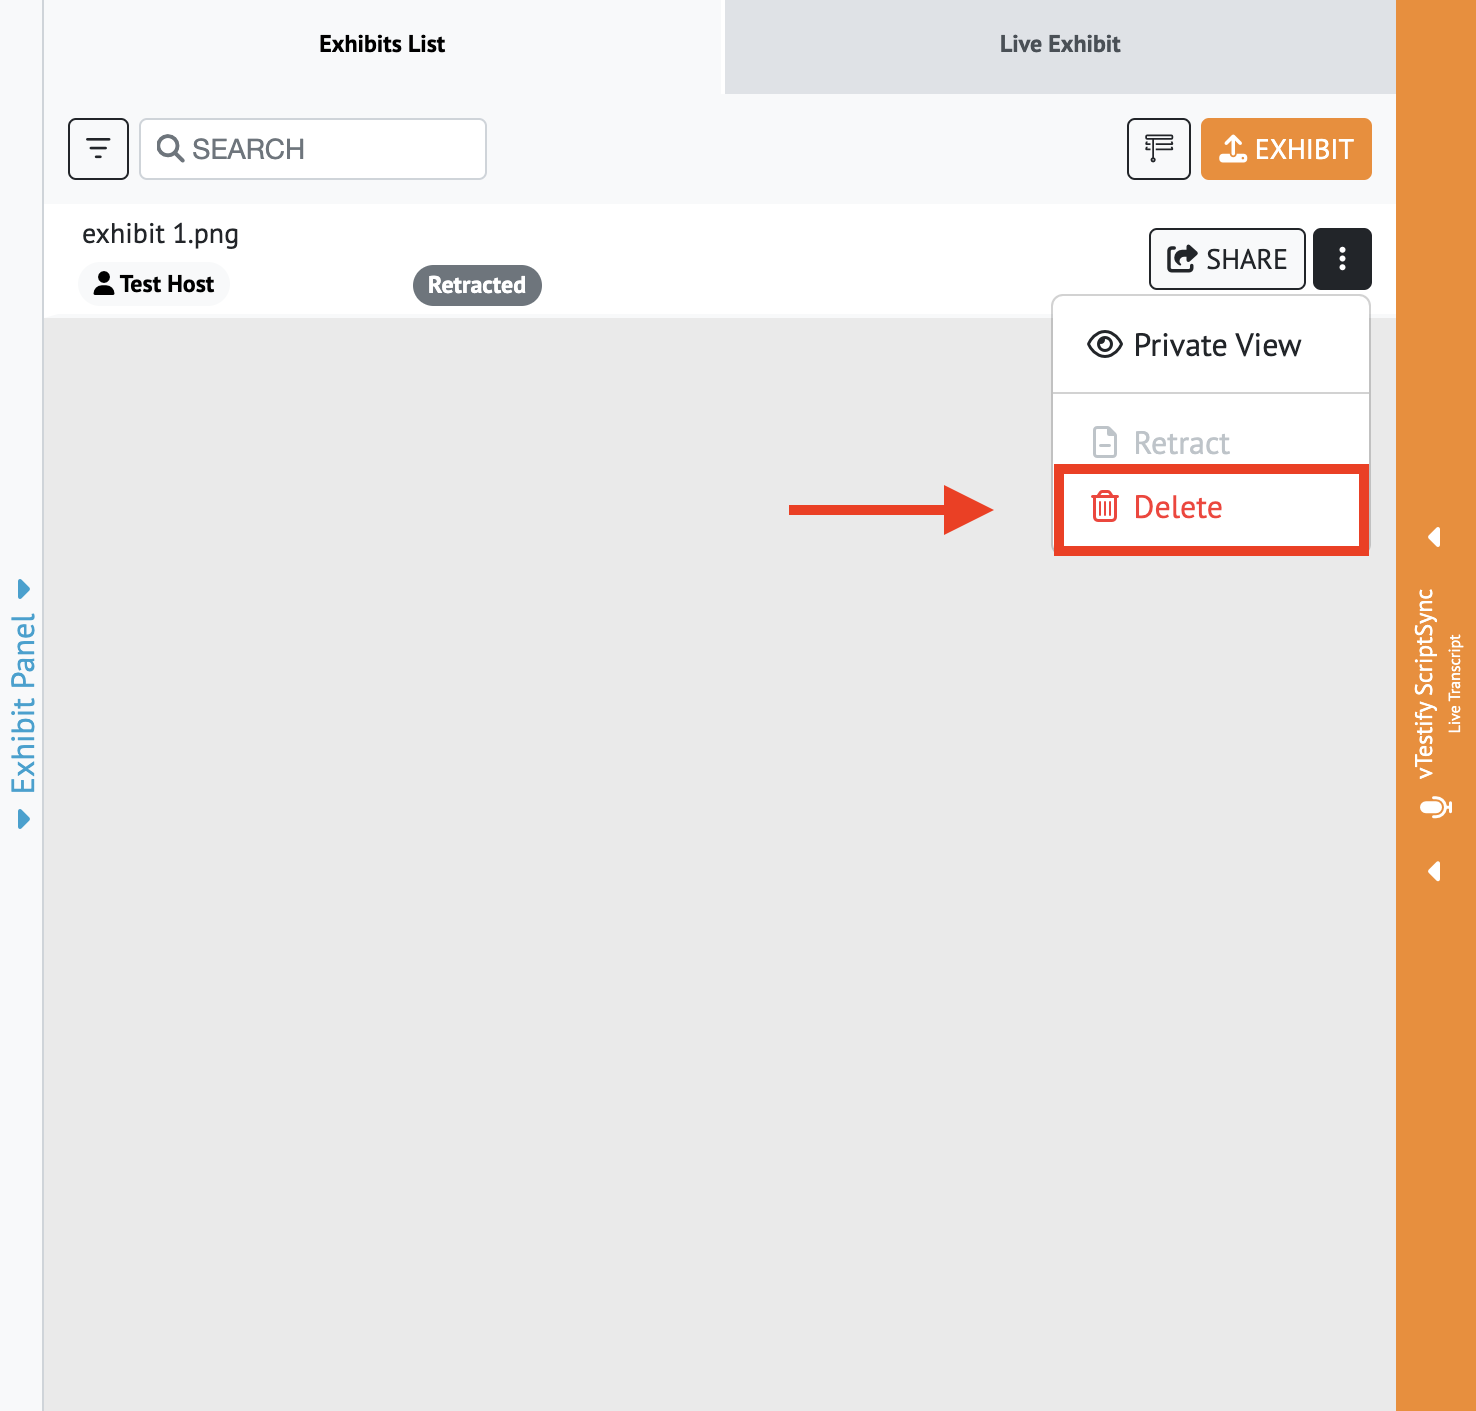
You can delete a shared exhibit by clicking the 3 Dot “Options' button
Select the “Retract” button
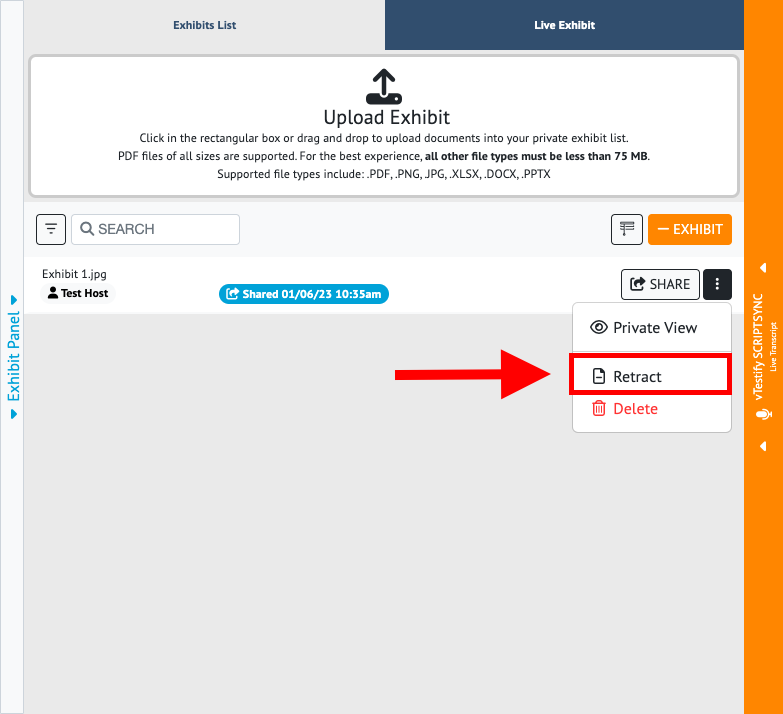
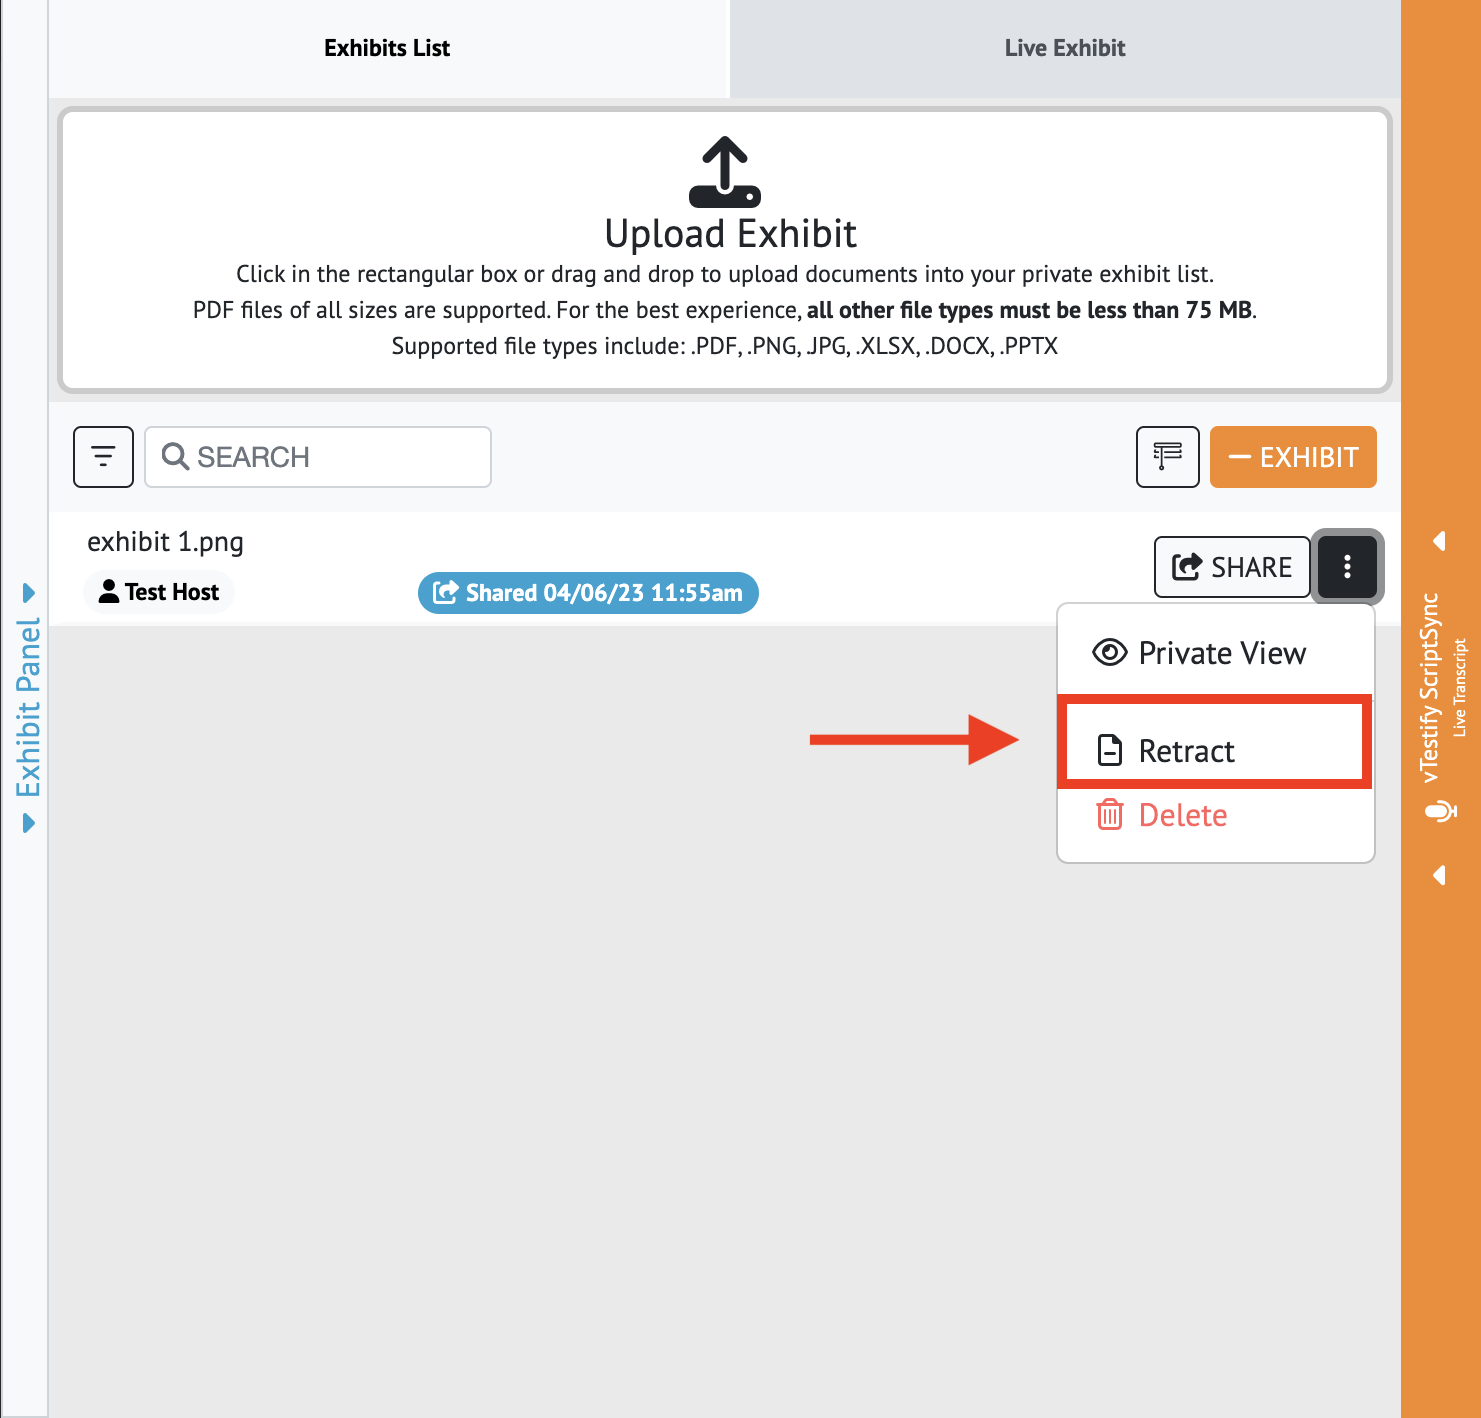
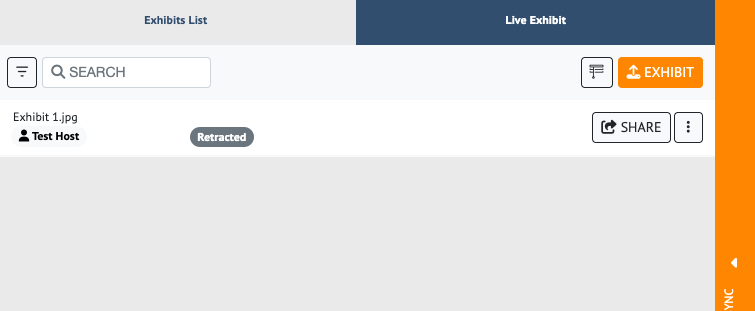
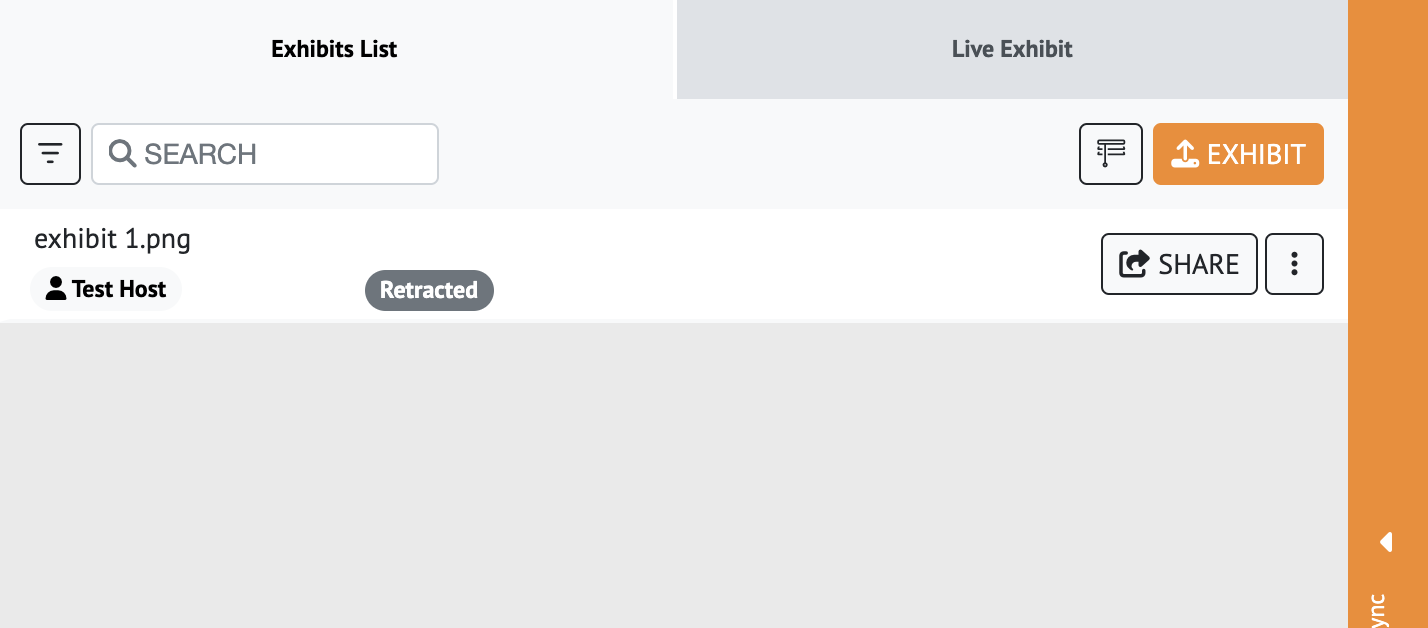
Once an exhibit has been retracted, it will show “Retracted” in your exhibit list
The exhibit will no longer appear for other users
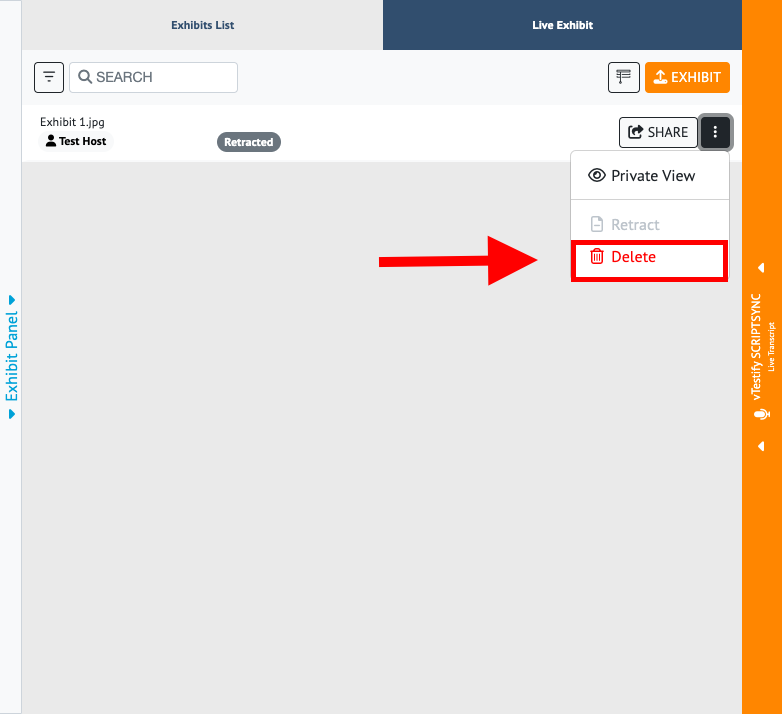
Click the 3 Dot 'Options” button and select “Delete” to delete the file
| Info |
|---|
Once the exhibit has been shared, you must close the shared document before it can be Retracted |
...