...
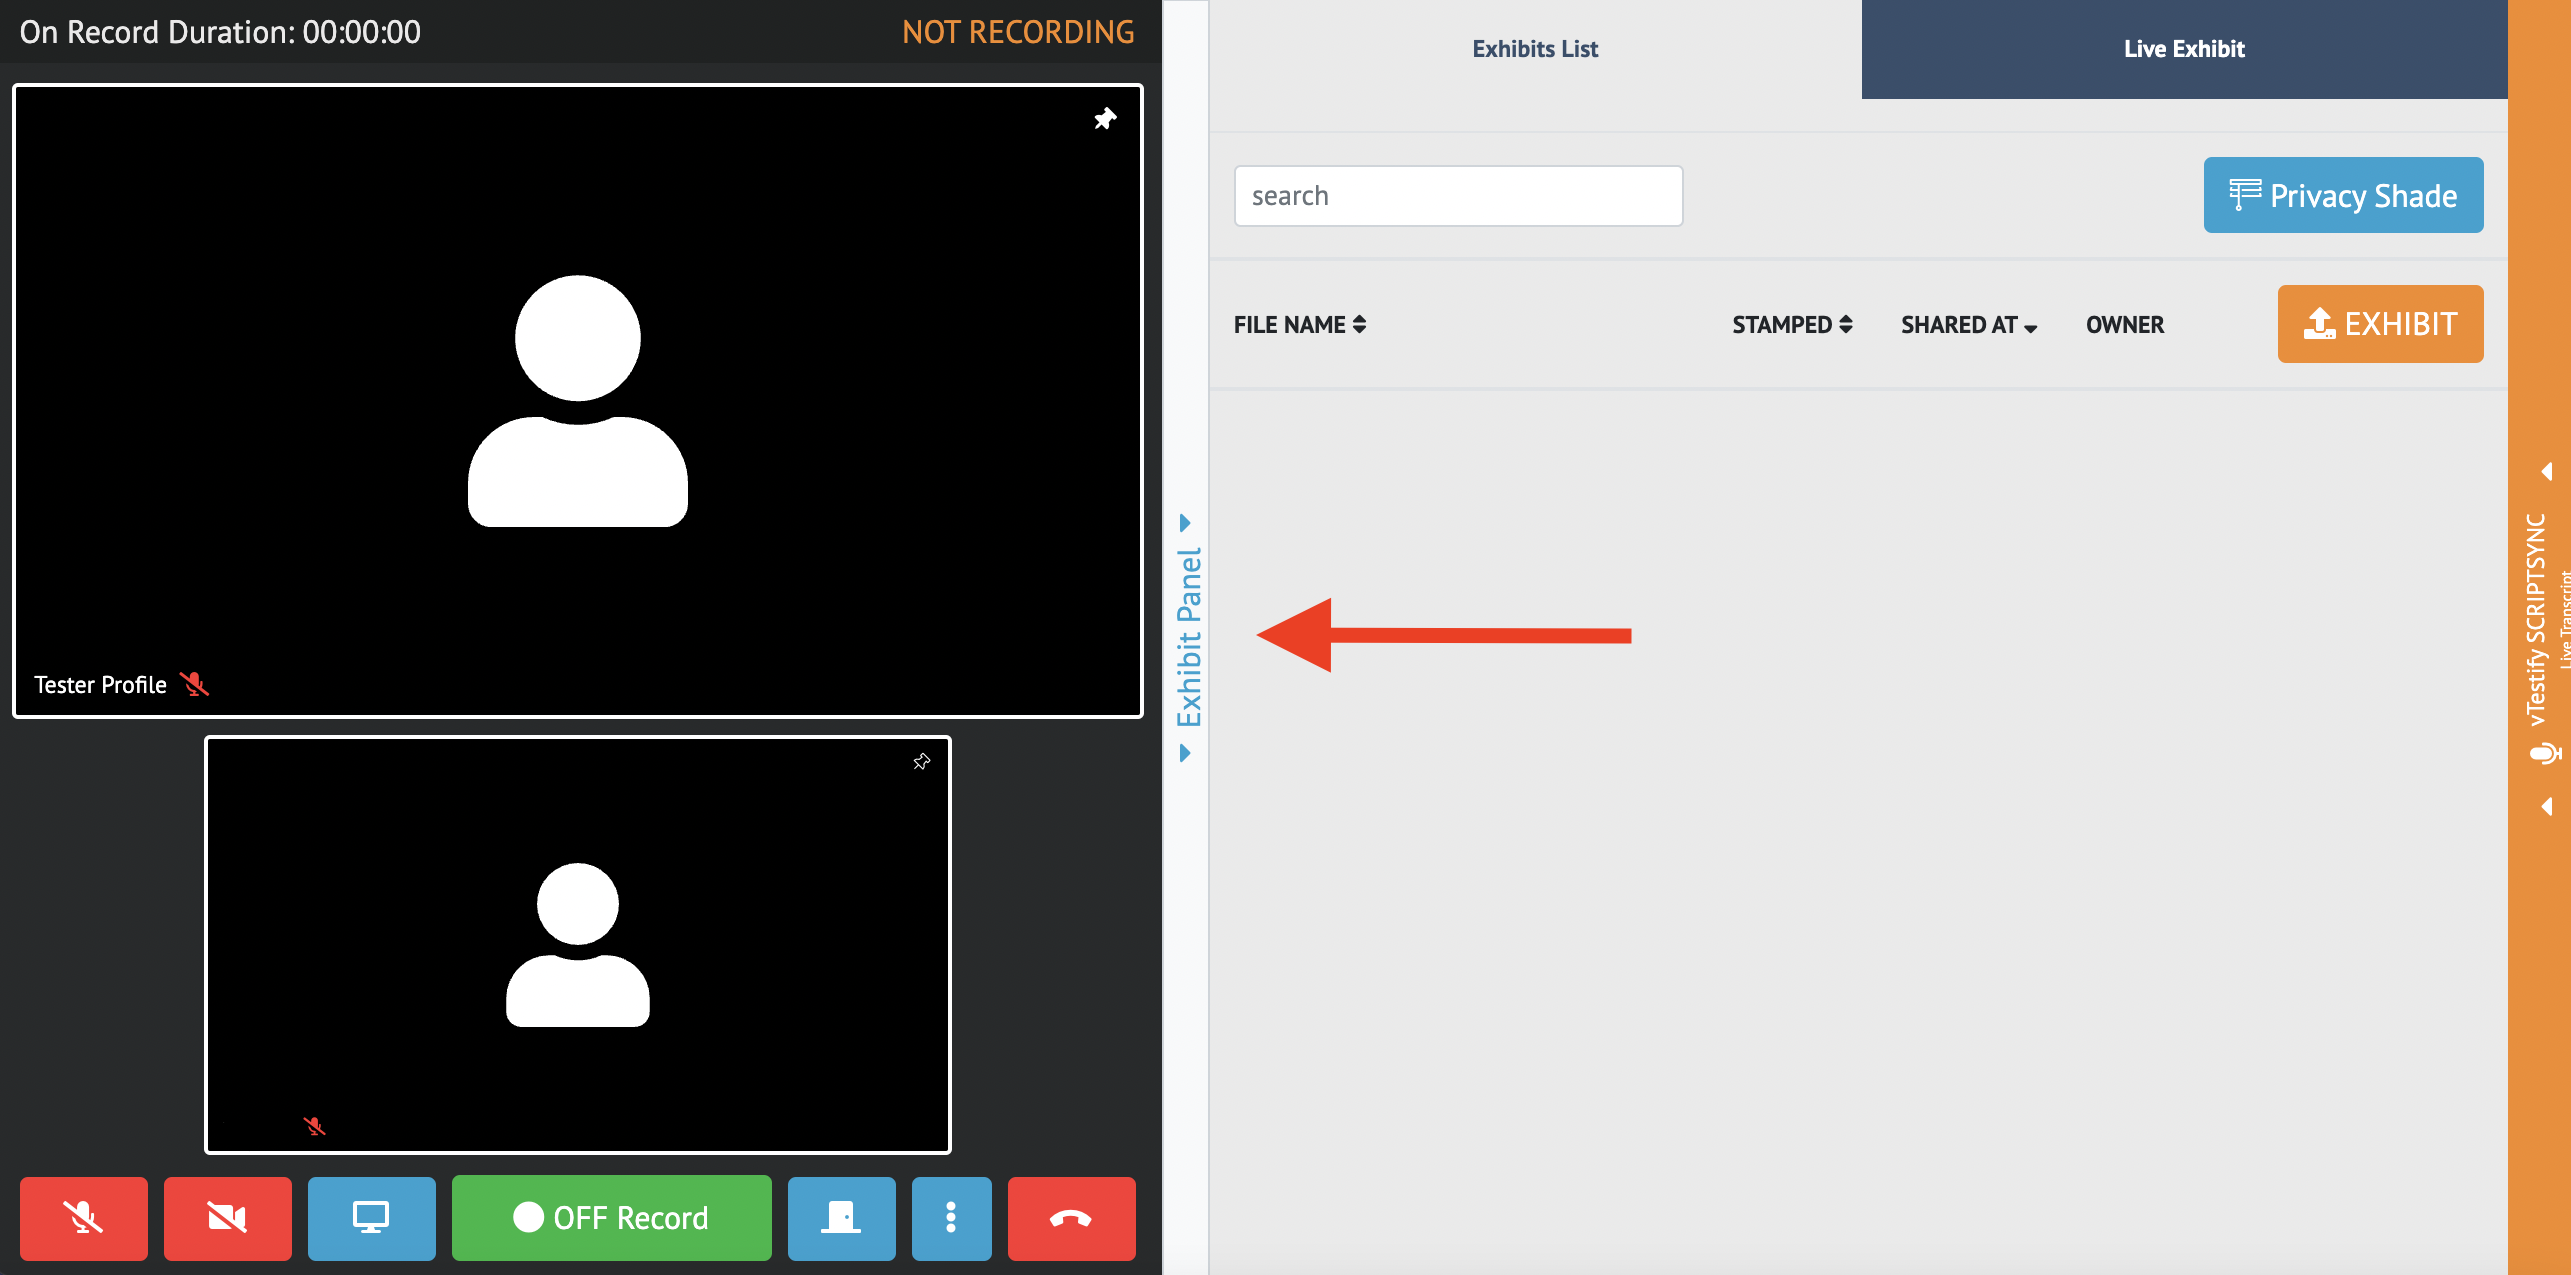
Open the exhibit panel in order to access all exhibit features.
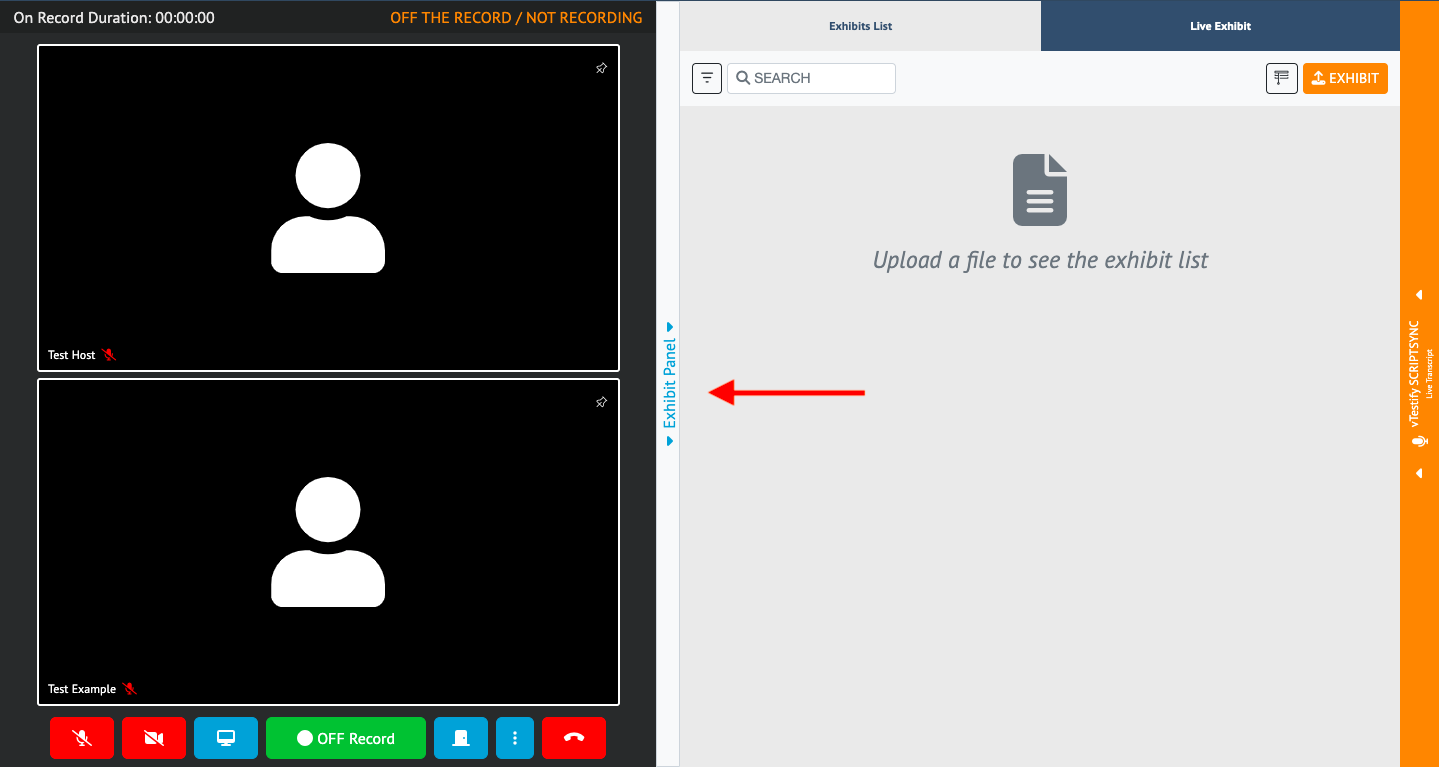
2. click the “Exhibit” button.
...
3.click anywhere in the “Upload Exhibit” box to access and upload documents.
| Info |
|---|
Supported documents: .PDF, .PNG, .JPG, .XLSX, .DOCX, .PPTX |
...
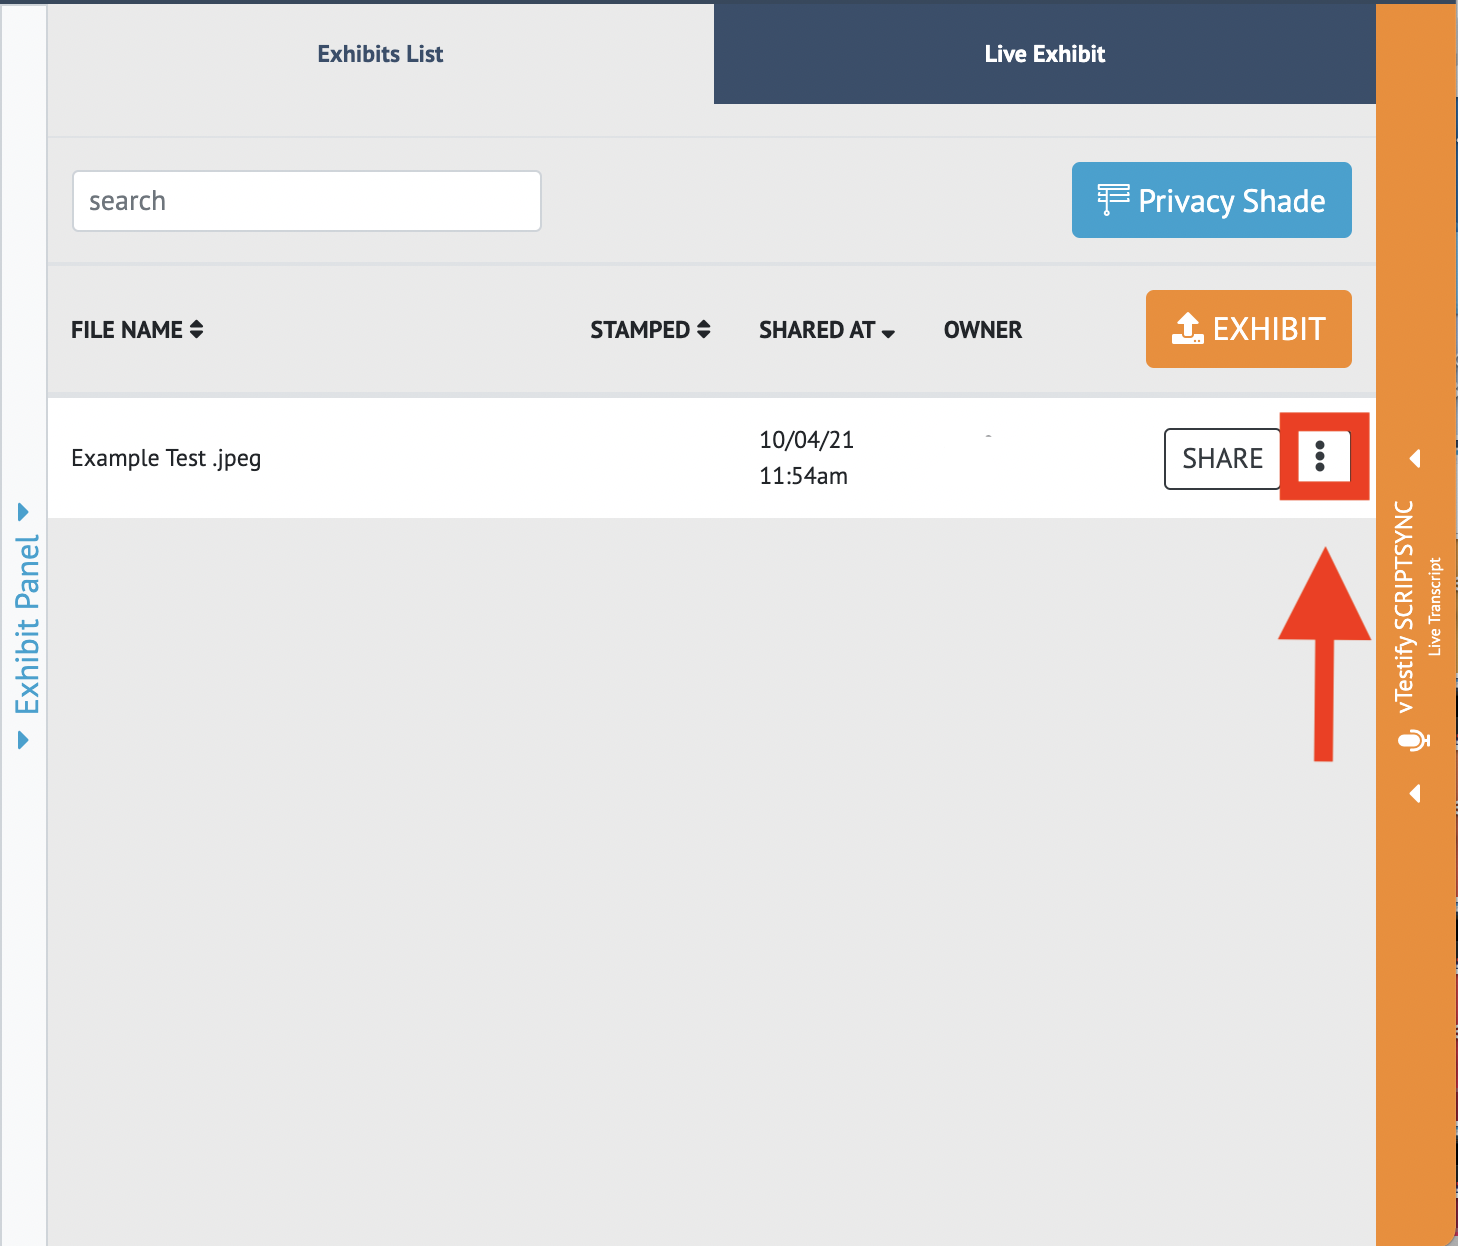
4. Once files are uploaded, they will appear in the “Exhibits List” tab and can be shared out.
...
...
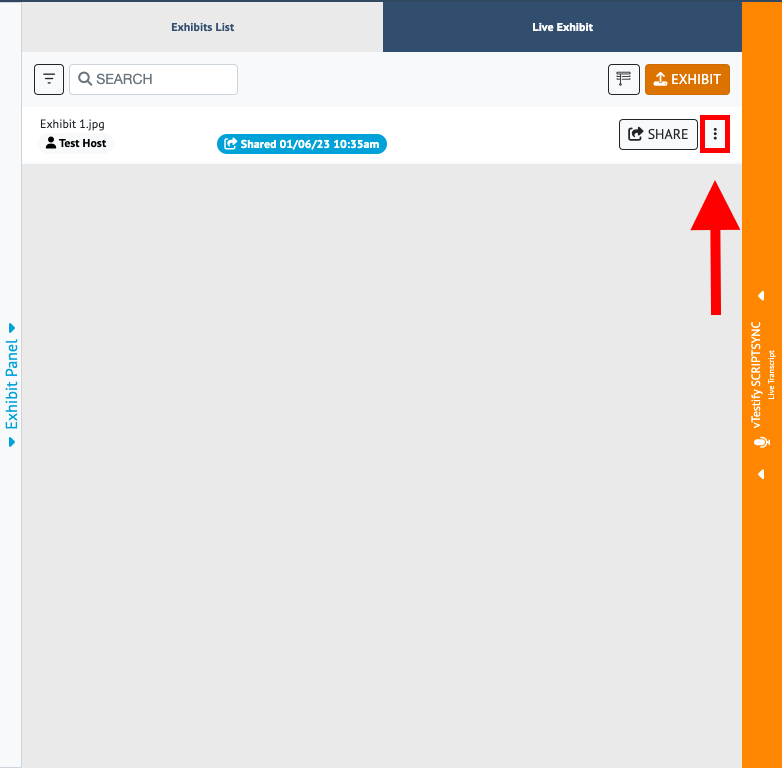
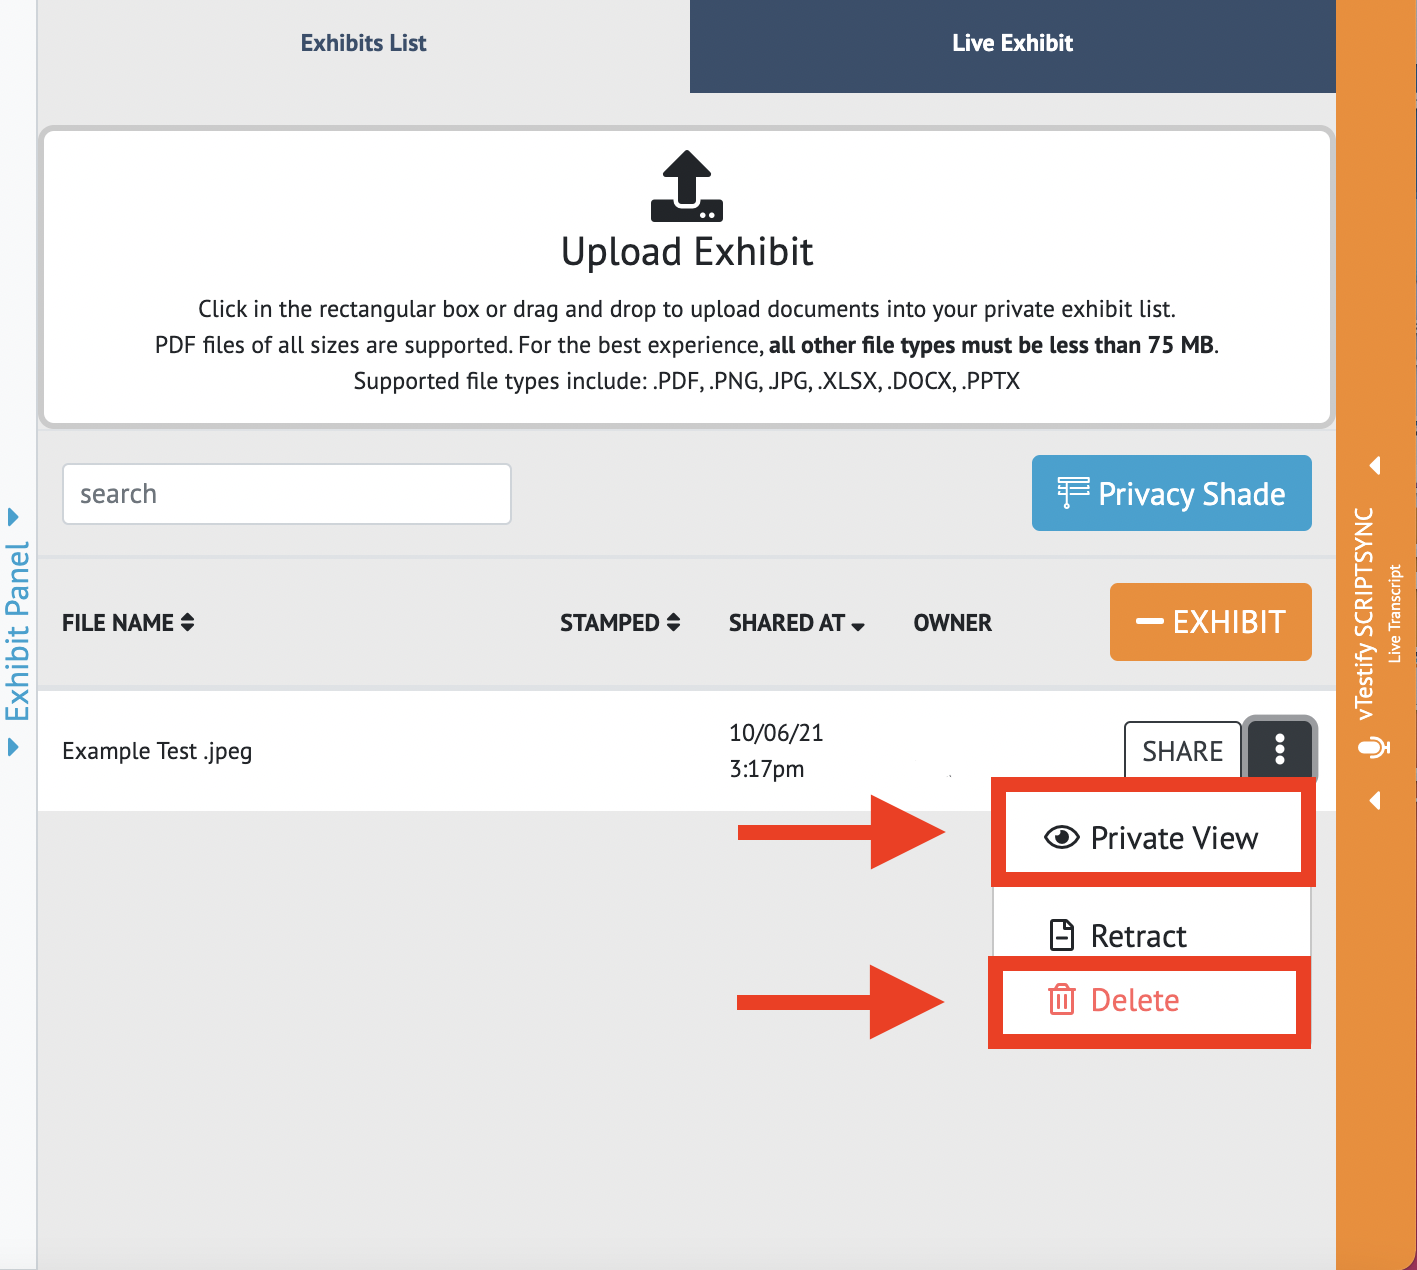
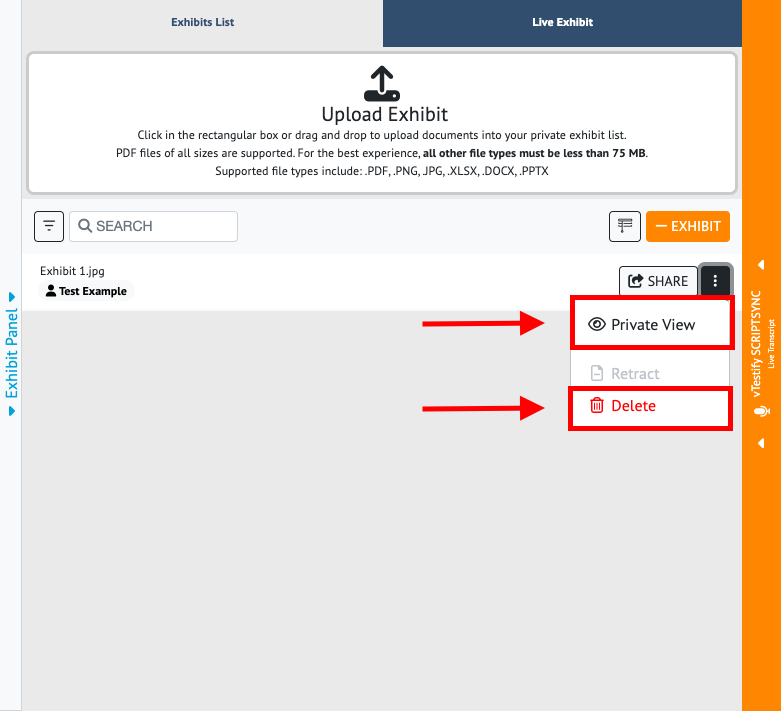
Click on the 3 Dot ‘options’ button next to the Share button
To view the exhibit before sharing it, select the “Private View” button
Uploaded exhibits may be stamped prior to sharing the exhibit. For more information, please see How-to Stamp an Exhibit
Exhibits can also be shared from the “Private View” by clicking the “Share” button at the top left of the preview screen.
To delete the exhibit before sharing it, select the “Delete” button
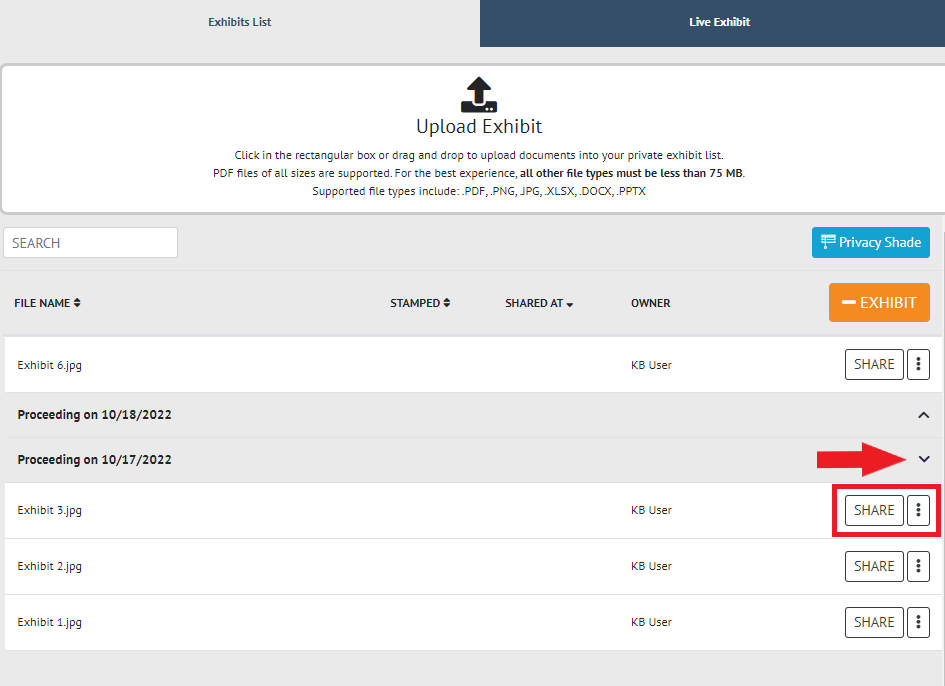
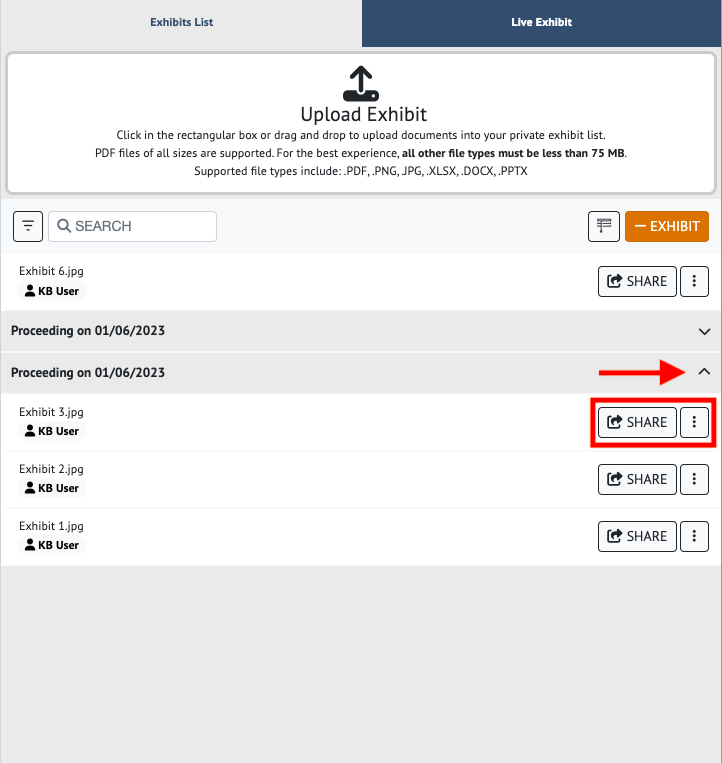
If your proceeding is part of a case, you may also view and share exhibits from the previous proceedings. This is done by clicking the carrot to expand the exhibits.
Clicking “Share” allows all attendees within the deposition to view the exhibit within the “Live Exhibit” tab of the deposition
All attendees will automatically be taken to the “Live Exhibit” tab once an exhibit has been shared on the record (This does not apply to attendees in the Side Bar Rooms)
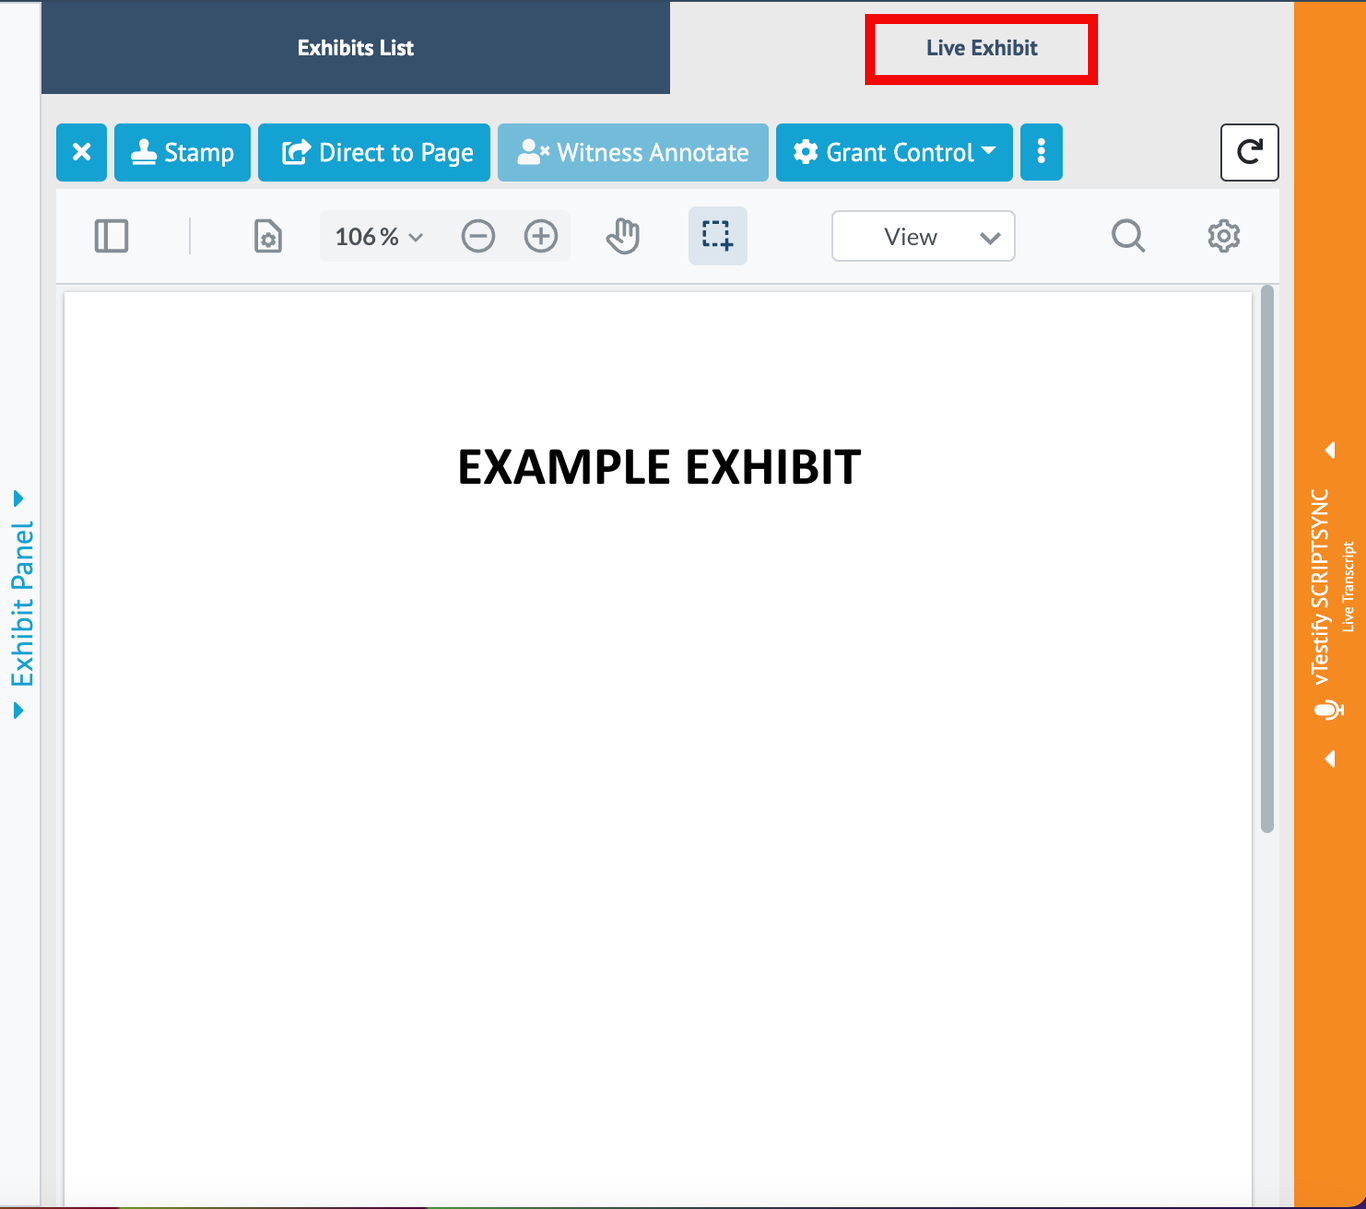
After sharing an exhibit to the deposition, you will also have the ability to click “Direct to Page”. This feature allows you to take everyone in the deposition to the page of the exhibit you are viewing.
...
i. Select the “Retract” button
...
b. Once an exhibit has been retracted, it will show “Retracted” in your exhibit list
i. The exhibit will no longer appear for other users
...
c. Click the 3 Dot 'Options” button and select “Delete” to delete the file
...
7. The “Privacy Shade” will allow you to keep your exhibit list private while you are utilizing the screen share feature. Please see How-to Screen Share Within a Deposition
...
a. Starting a Screen Share will automatically enable the Privacy Shade over your exhibit list.
...